One of the first things I noticed in Eamon's room was a novelty mini skateboard I had bought him during the summer from Five Below. Since it is something that is not regularly used (given that he has only just turned 2 and we literally a dozen other boards in the house), I decided to put it to good use and mount it to the wall above the vintage Playschool Record Player I dug out from my childhood pile and set up in his room.
The project is really quite easy and requires minimal skill (so don't fret if you're not a master building!)Now, everyone likes to make their shelves a bit differently: some people use prefabricated bookshelf materials and some people go for simple braces; it's really up to you. I chose to use small corner braces because I was using a small board to begin with and didn't want it to be "clunky" looking.
Here's what you need:

Aside from the board you need a set of corner brackets. I got these at Lowe's for $2.87 for a set of four. They come with screws already, but, depending on the thickness of your board you will need two to four screws a bit smaller to mount into the actual skateboard. I used a hammer to make tiny pilot holes into the wall and into the skateboard and used good old arm strength and a screwdriver to screw in the screws (you can obviously use a screw gun also, I was just too lazy to charge mine).
Let's recap those materials so that you are not running up and down the stairs a million times:
- Skateboard
- Braces / Brackets with screws
- Smaller screws to go into your board
- Hammer (which I used to make tiny pilot holes)
- Screwdriver or screw gun
- Small level
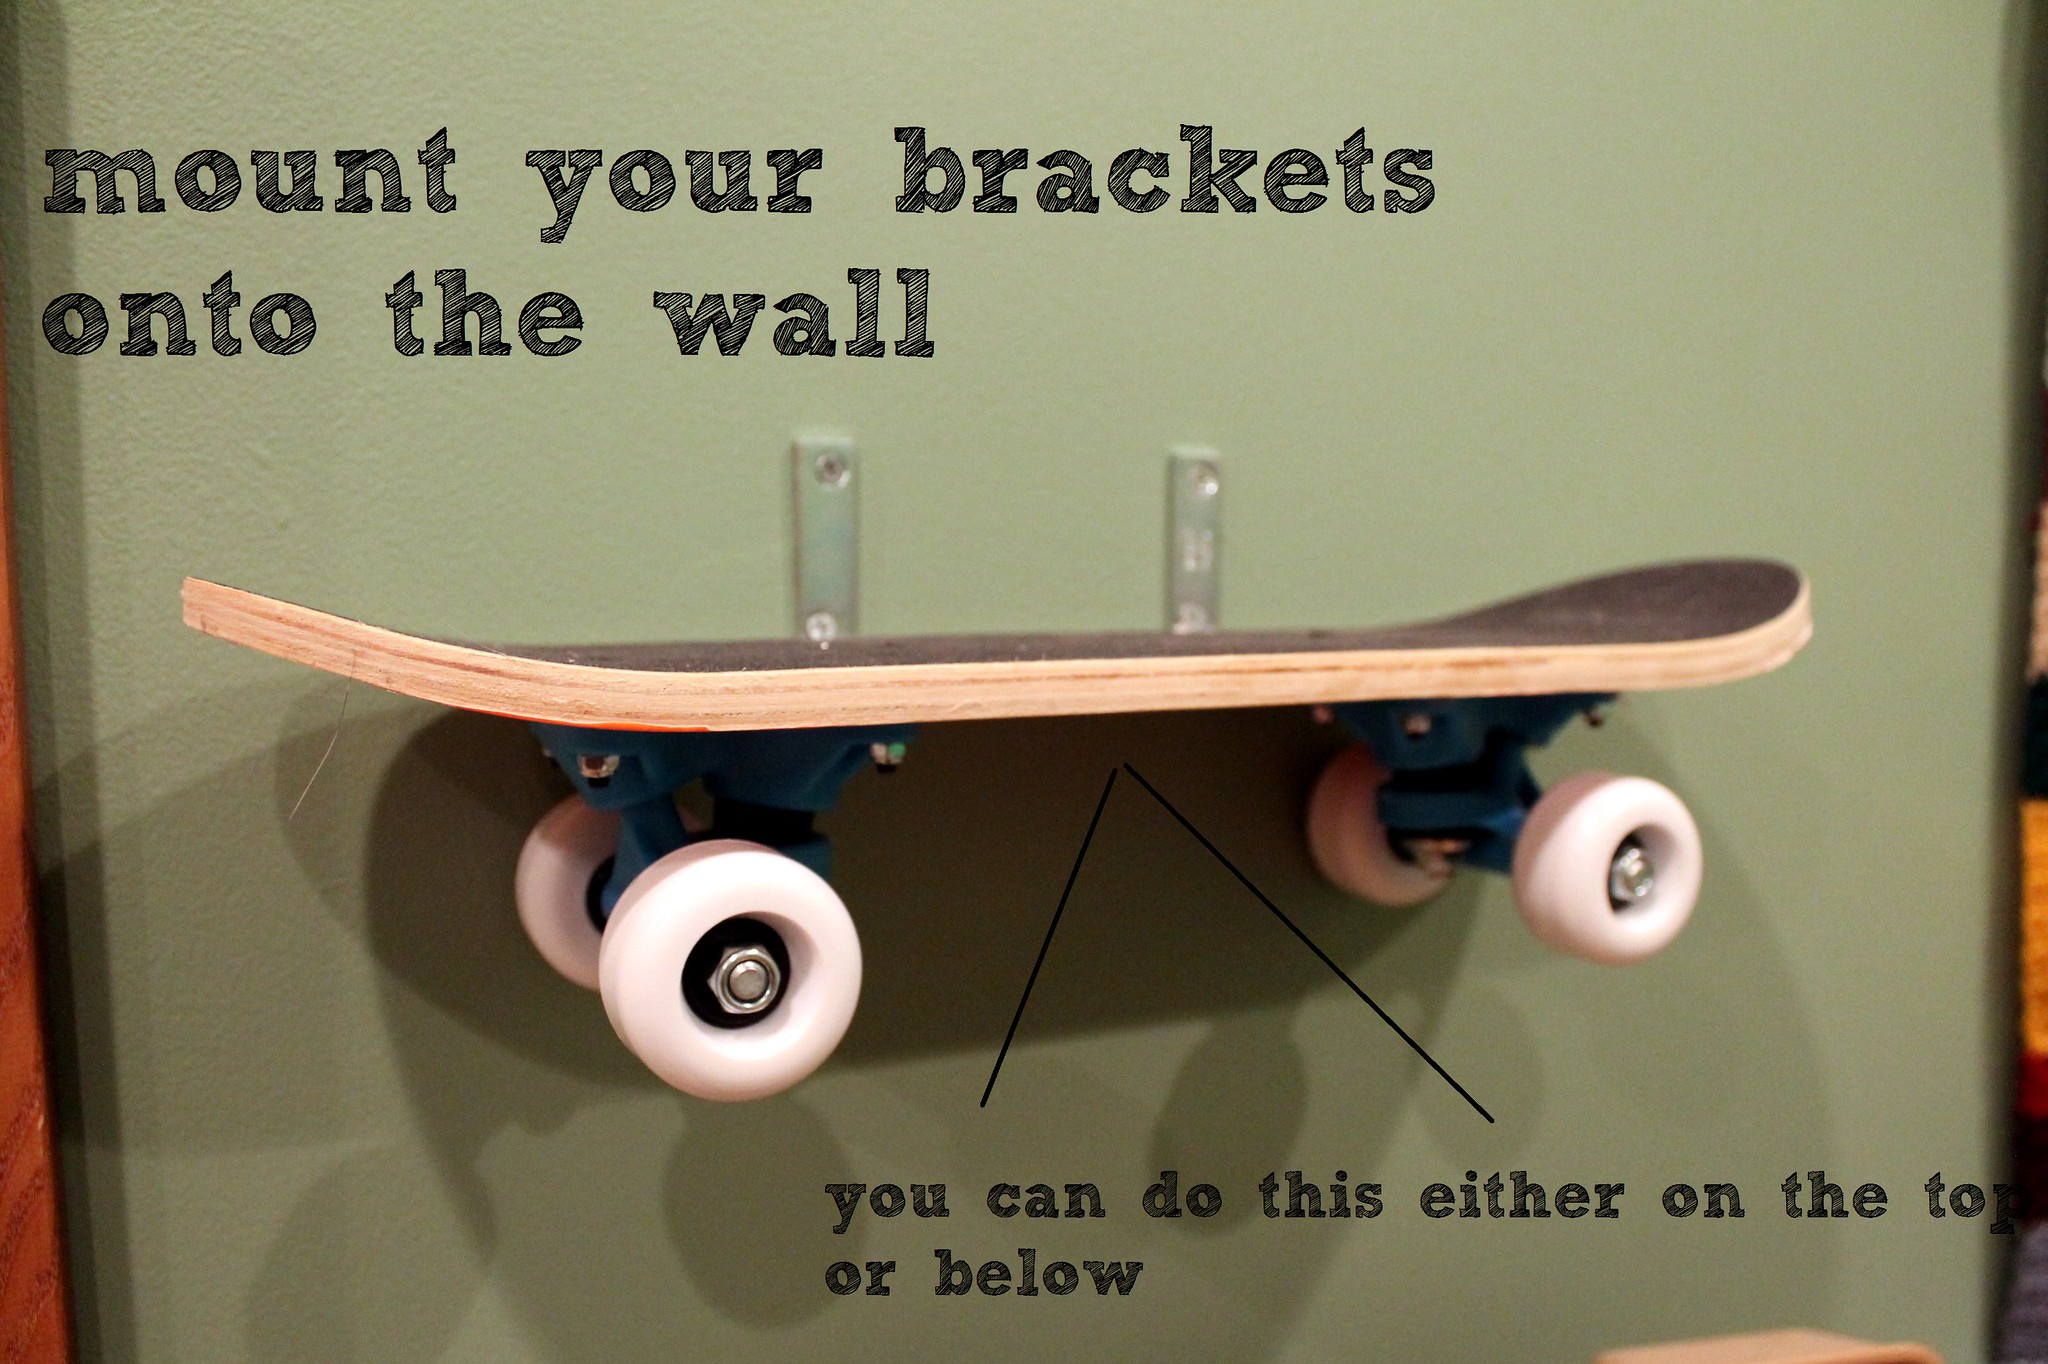
Next, identify where you want to mount your shelf. Ideally you will want to secure it into the wall studs, but given the width of the board you will only be able to secure it into one wall stud. As long as you don't place too much weight on your shelf this will be fine. I'm no master builder, but common sense says not to place 50lbs of crap onto a tiny shelf that is basically floating into a piece of drywall on one side.
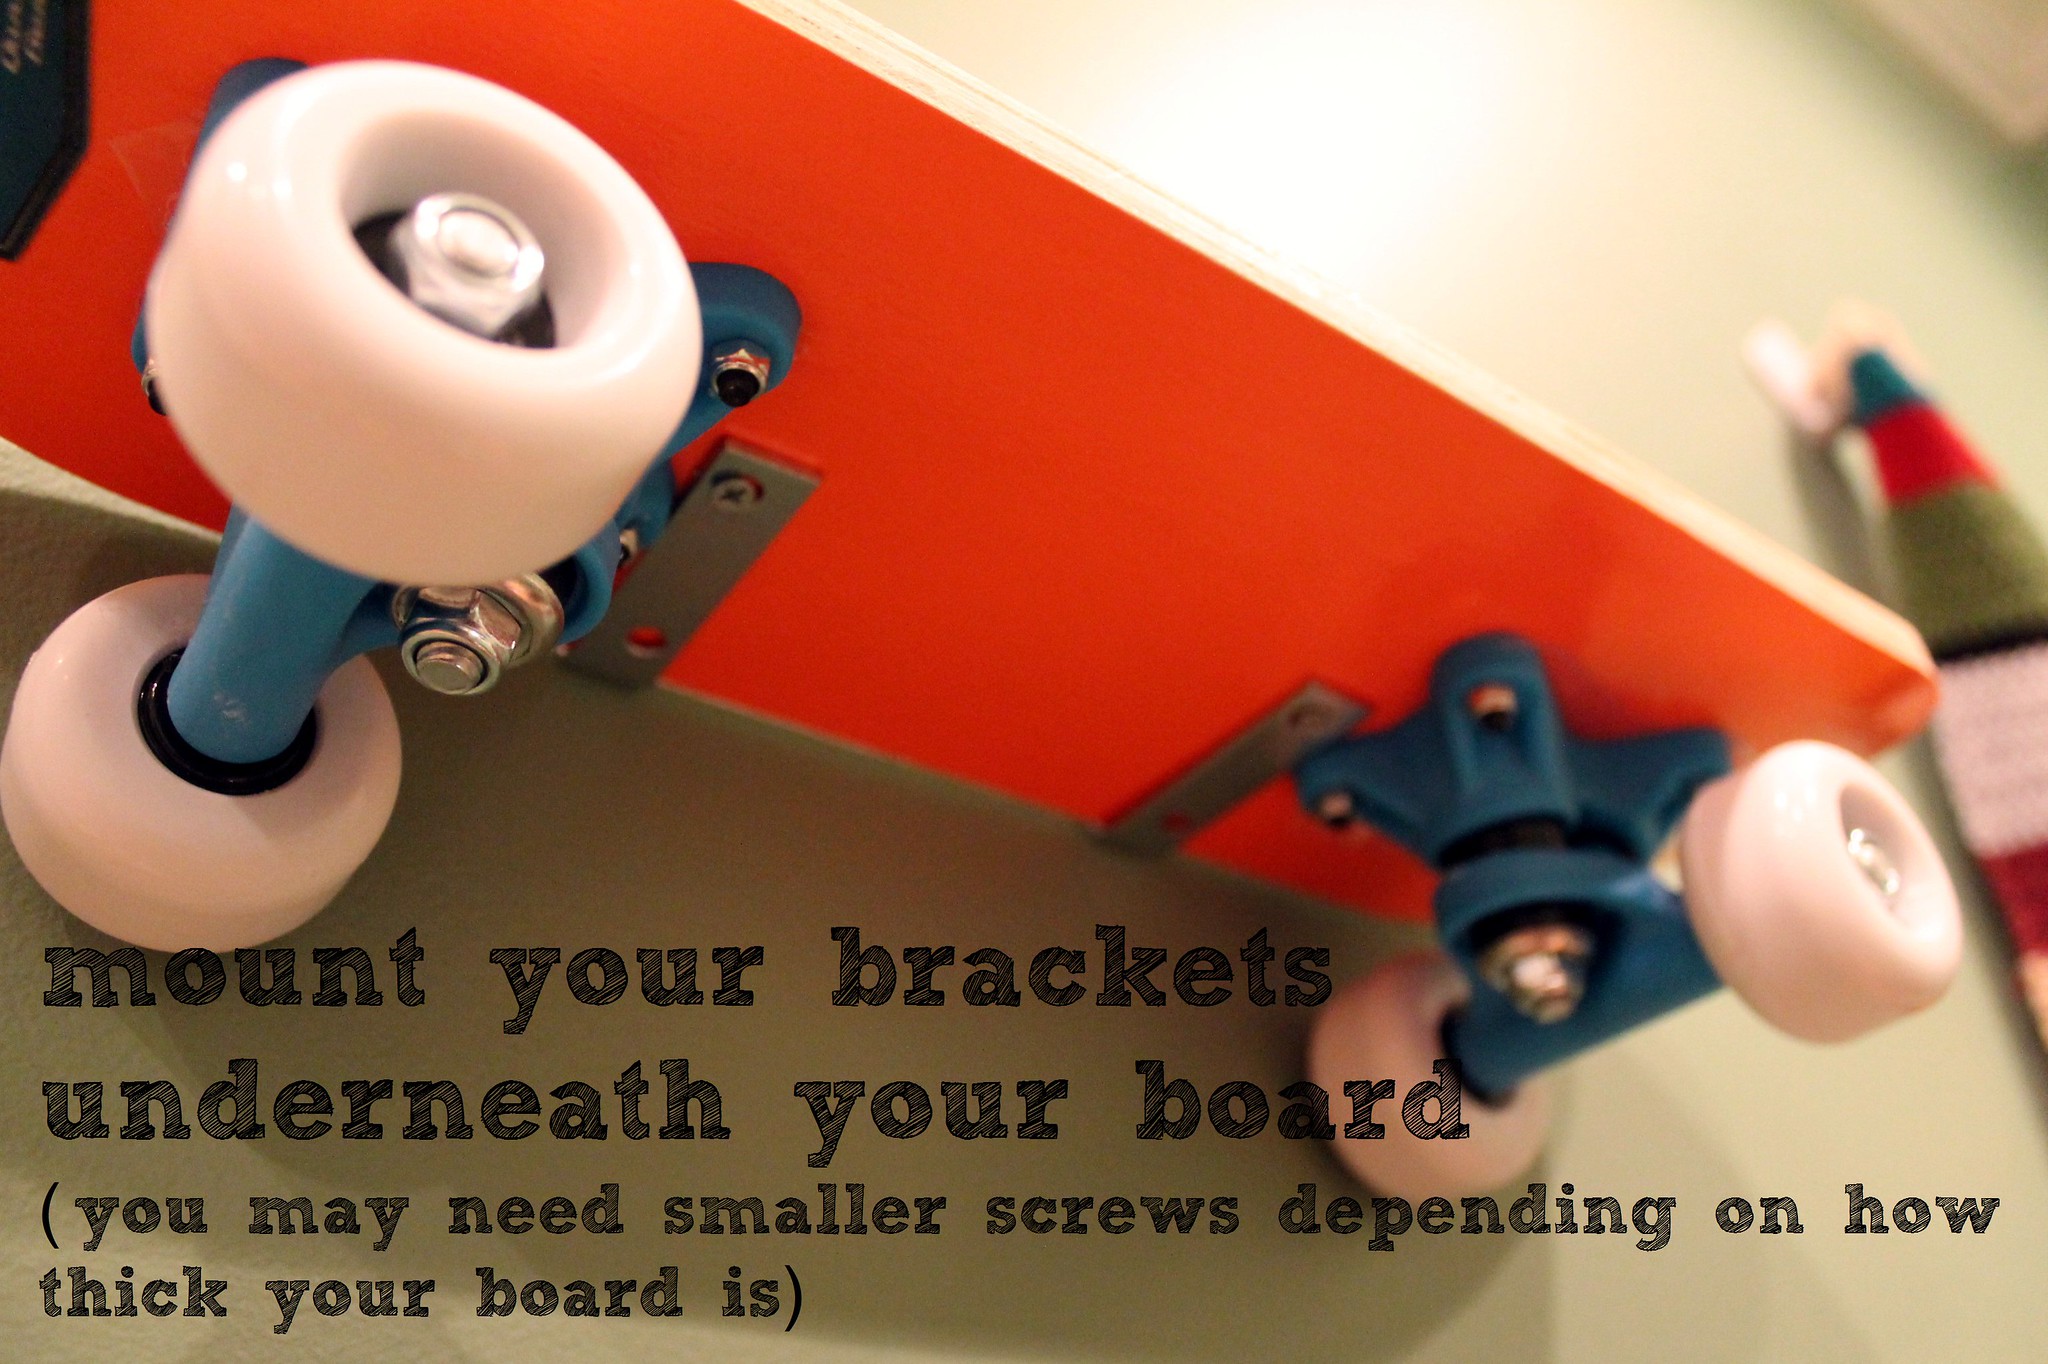
Once you have an idea where you want to mount it and have marked your location, your next step is to secure the bottoms of the brackets to your board. Since I was hiding the brackets with records, I decided to mount the brackets facing upwards as opposed to downwards. Again, the decision is yours to make. (If you are displaying items on your shelf that are smaller, I would suggest facing the rest of the bracket downwards.) I made tiny pilot holes and screwed the brackets into the board just to the outside of the trucks. (You can only see one screw on each brace in this photo, but I did go back and add more). This was quite easily done with just a screwdriver.
Next, take you board / shelf and position it onto the wall where you have already marked. Make your pilot holes and get screwing but MAKE SURE YOUR SHELF IS LEVEL! This is uber important so that it looks not only clean and professional but so that your stuff doesn't go sliding off because it is lopsided (ha!).
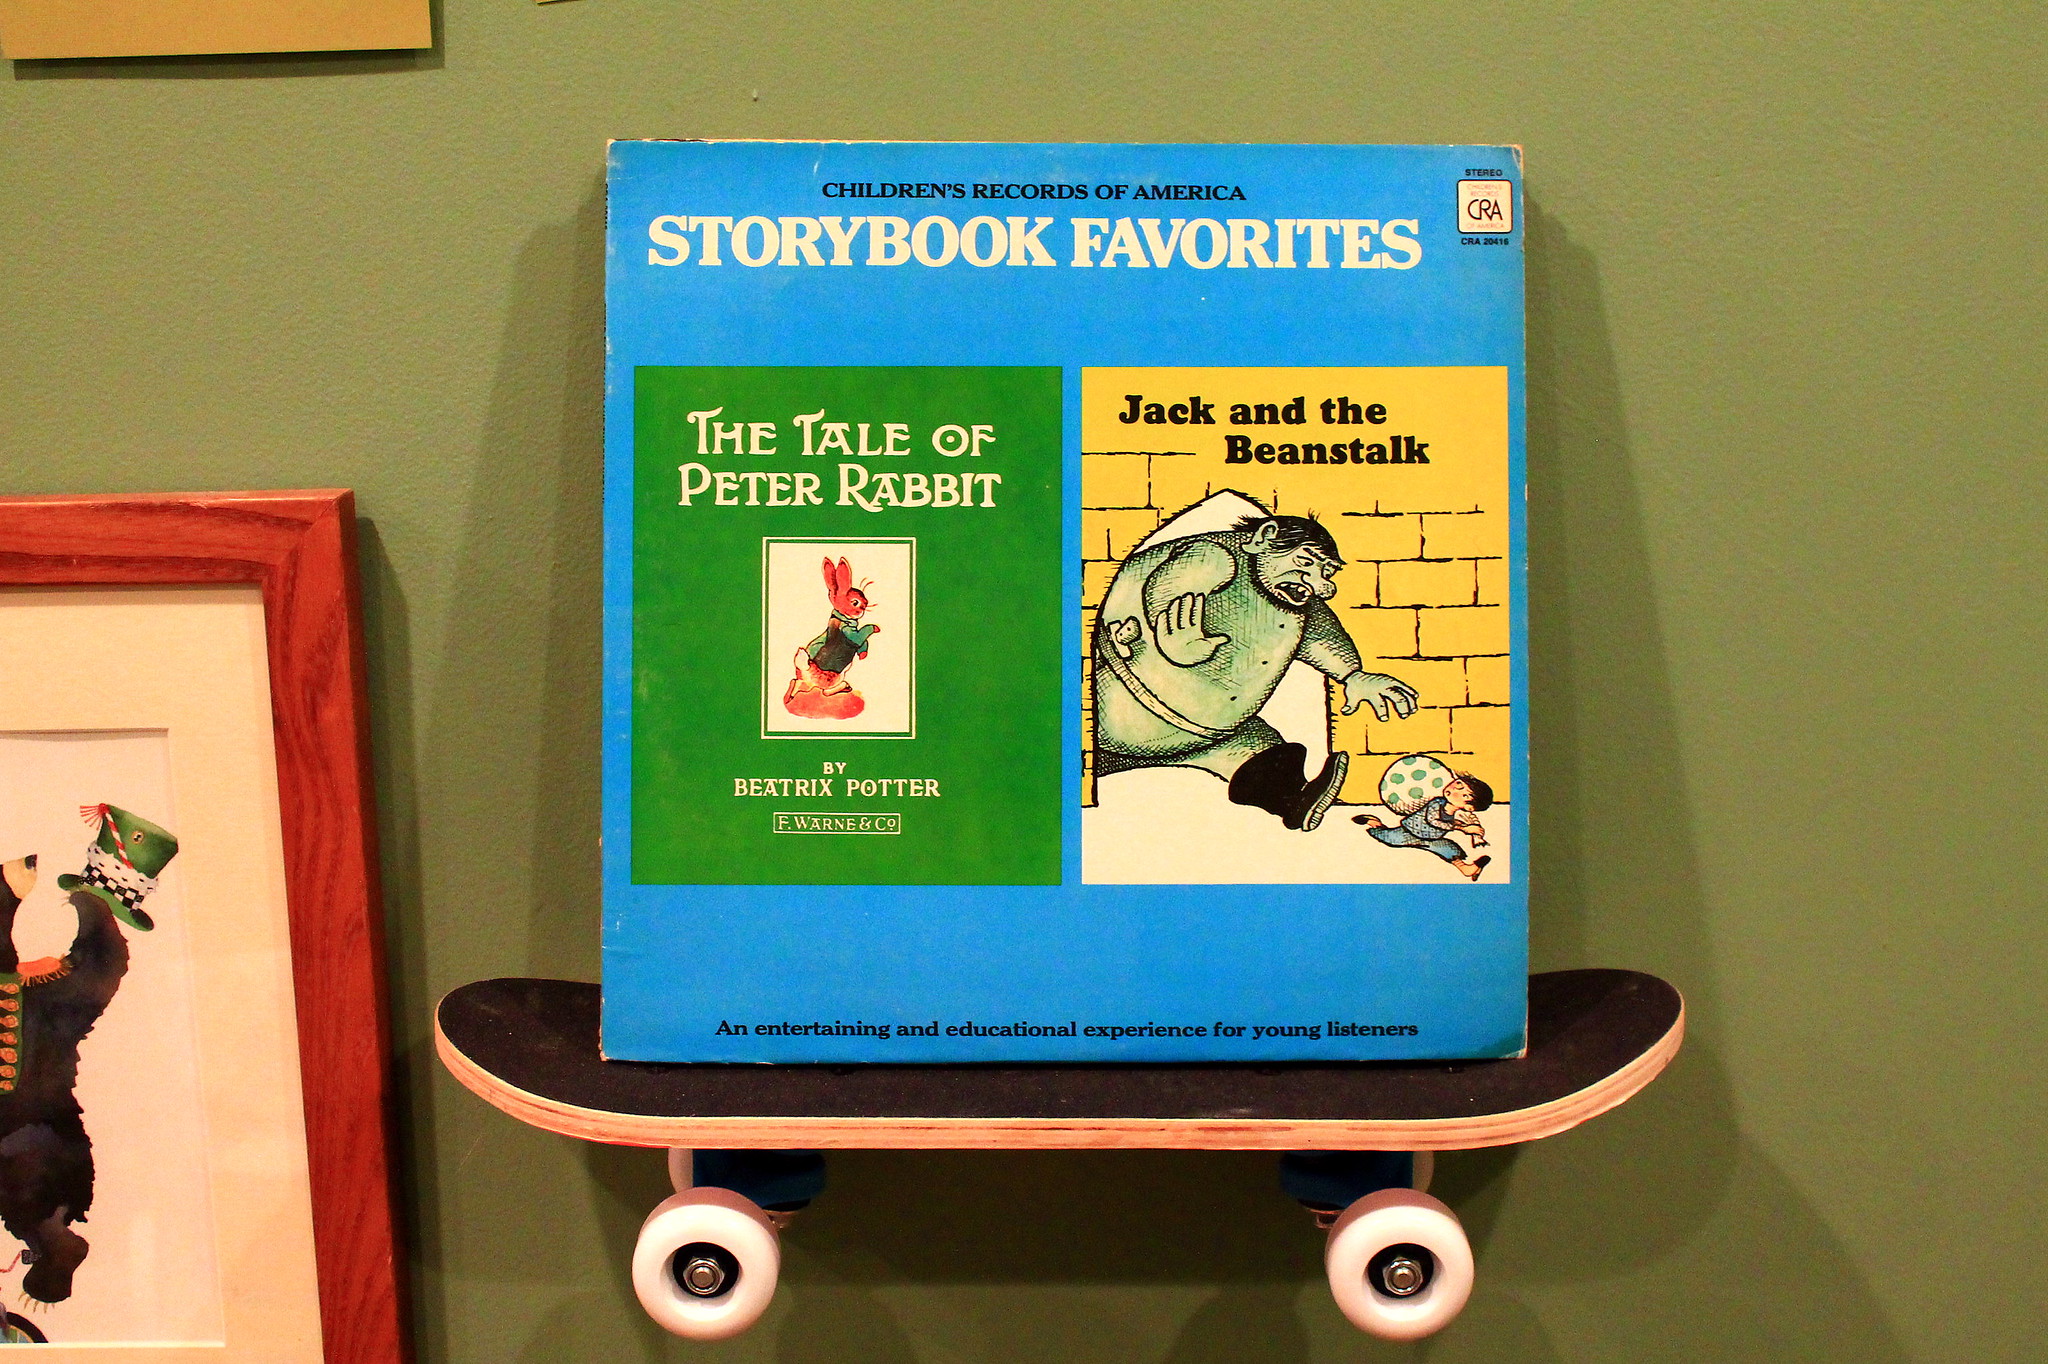
Before you know it you'll have a super cute and super cheap skateboard shelf to display your and your little one's goods. As you can see I used mine to stack a few of the children's story time records we bought at the thrift shop for a quarter each!
So let's recap the cost for this project:
- Skateboard - $5 from Five Below
- Corner Brackets - $2.87 from Lowes
- Smaller screws (about 1/4") if necessary (I already had some in my stash, but if you don't they are under $1 at the hardware store
TOTAL COST FOR THIS PROJECT = $8.87
TOTAL I SPENT FOR THIS PROJECT = $2.87
One of the first things I noticed in Eamon's room was a novelty mini skateboard I had bought him during the summer from Five Below. Since it is ... skateboardmini.blogspot.de
ReplyDelete