Philadelphia Gardens - Photography

Untitled-32

For the past few years I have been a bit obsessed with finding little gardens in the Philadelphia area, mainly in the areas where I live and work because it gives me an excuse to get out on my bike at lunch with my camera to enjoy the sun. Well, today, even though there was no sun, I rode to one of my favorite spots to grab a few photos.

IMG_1938
IMG_1933 - IMG_1920 - IMG_1911 - IMG_1927 
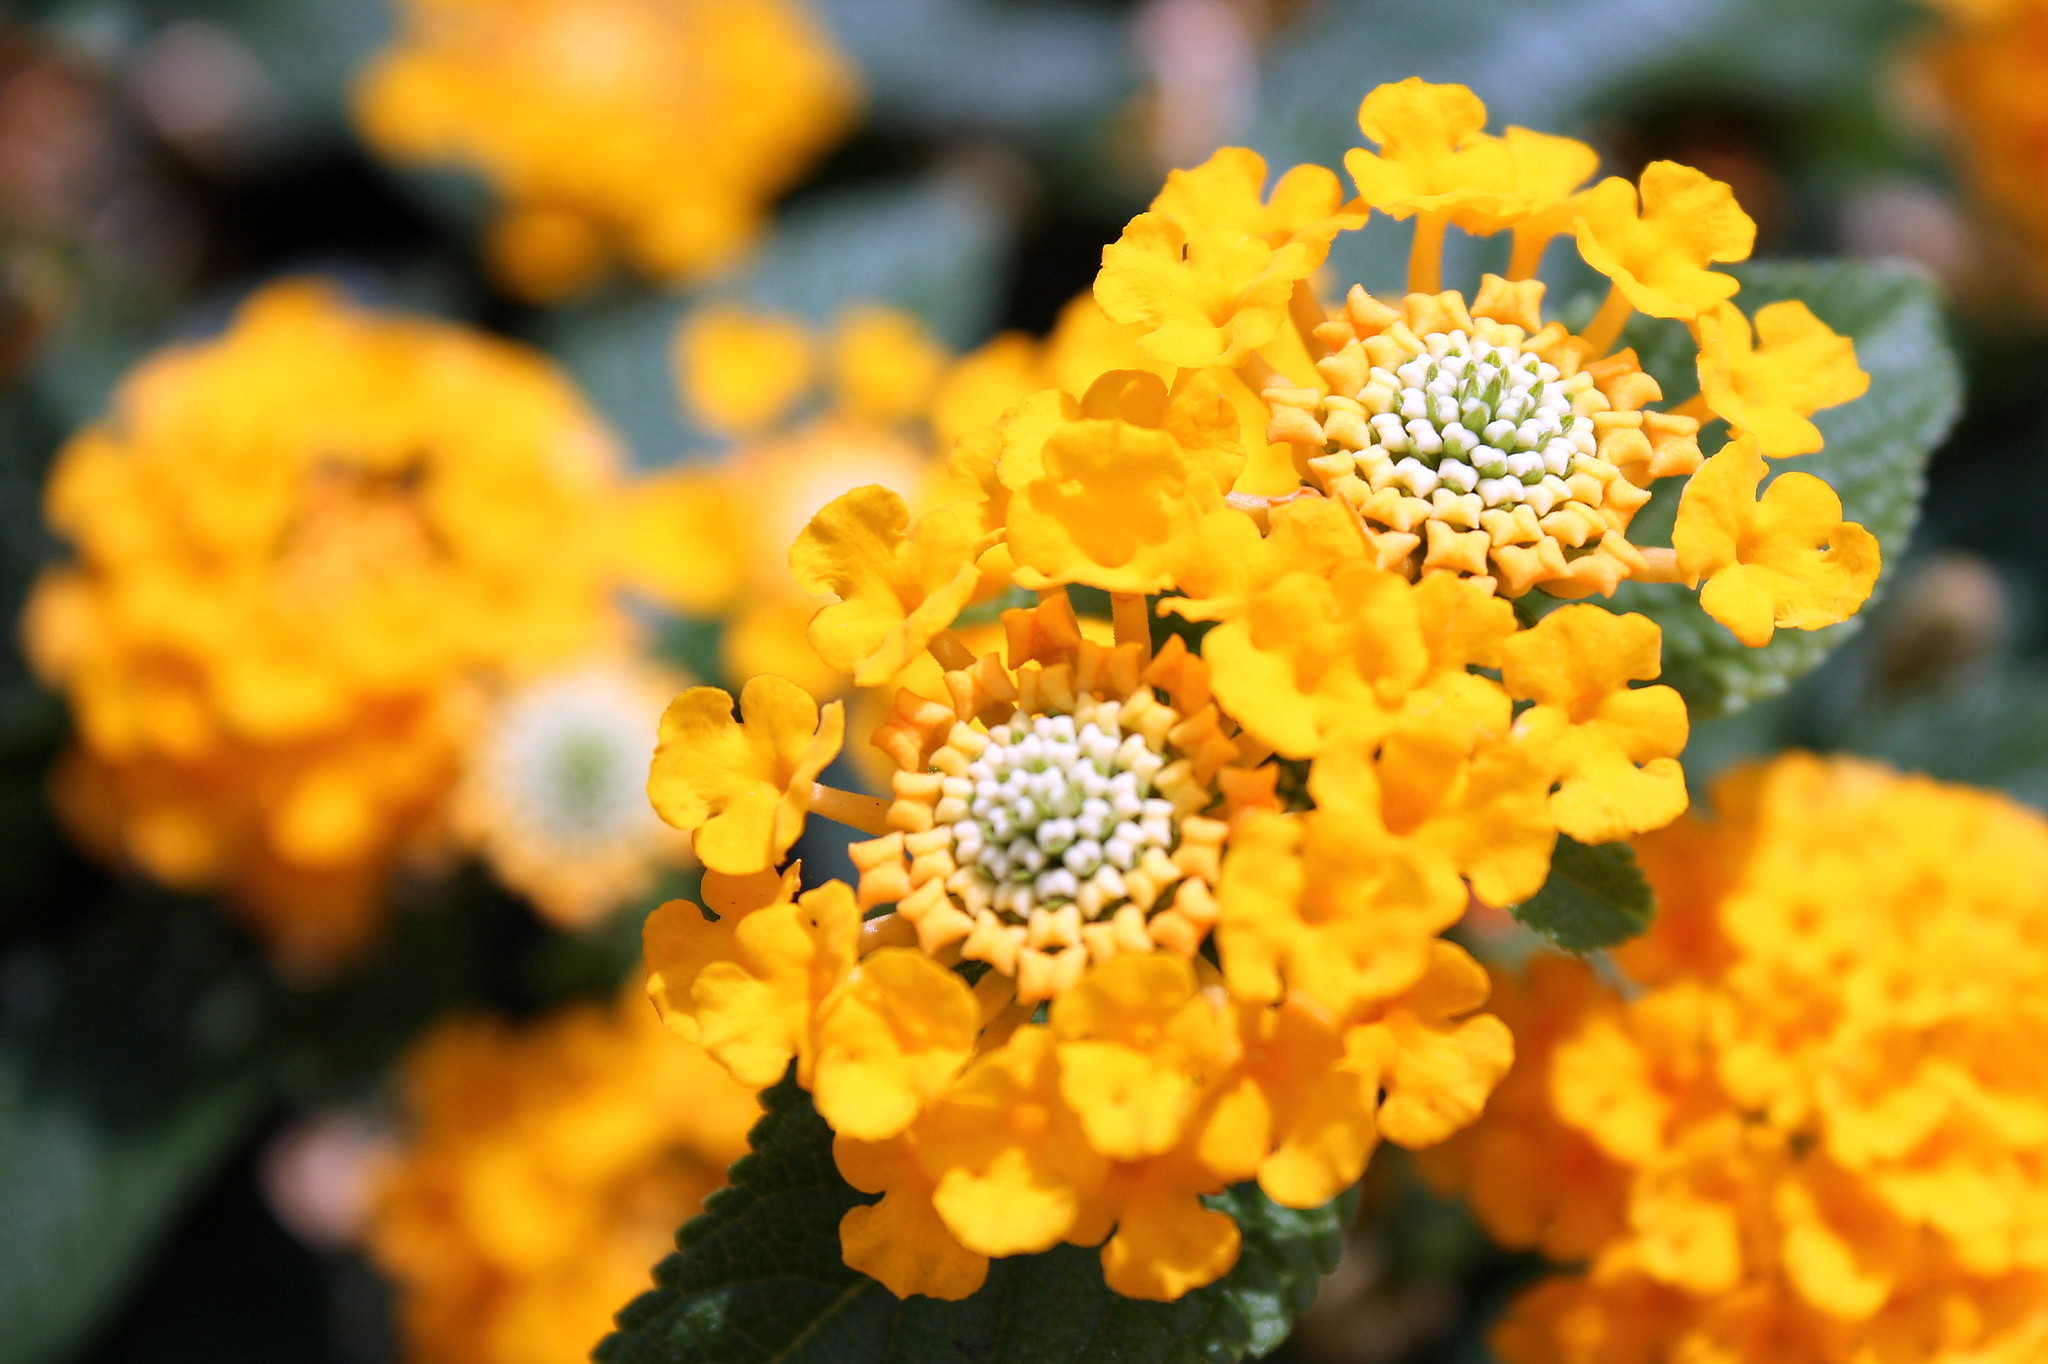
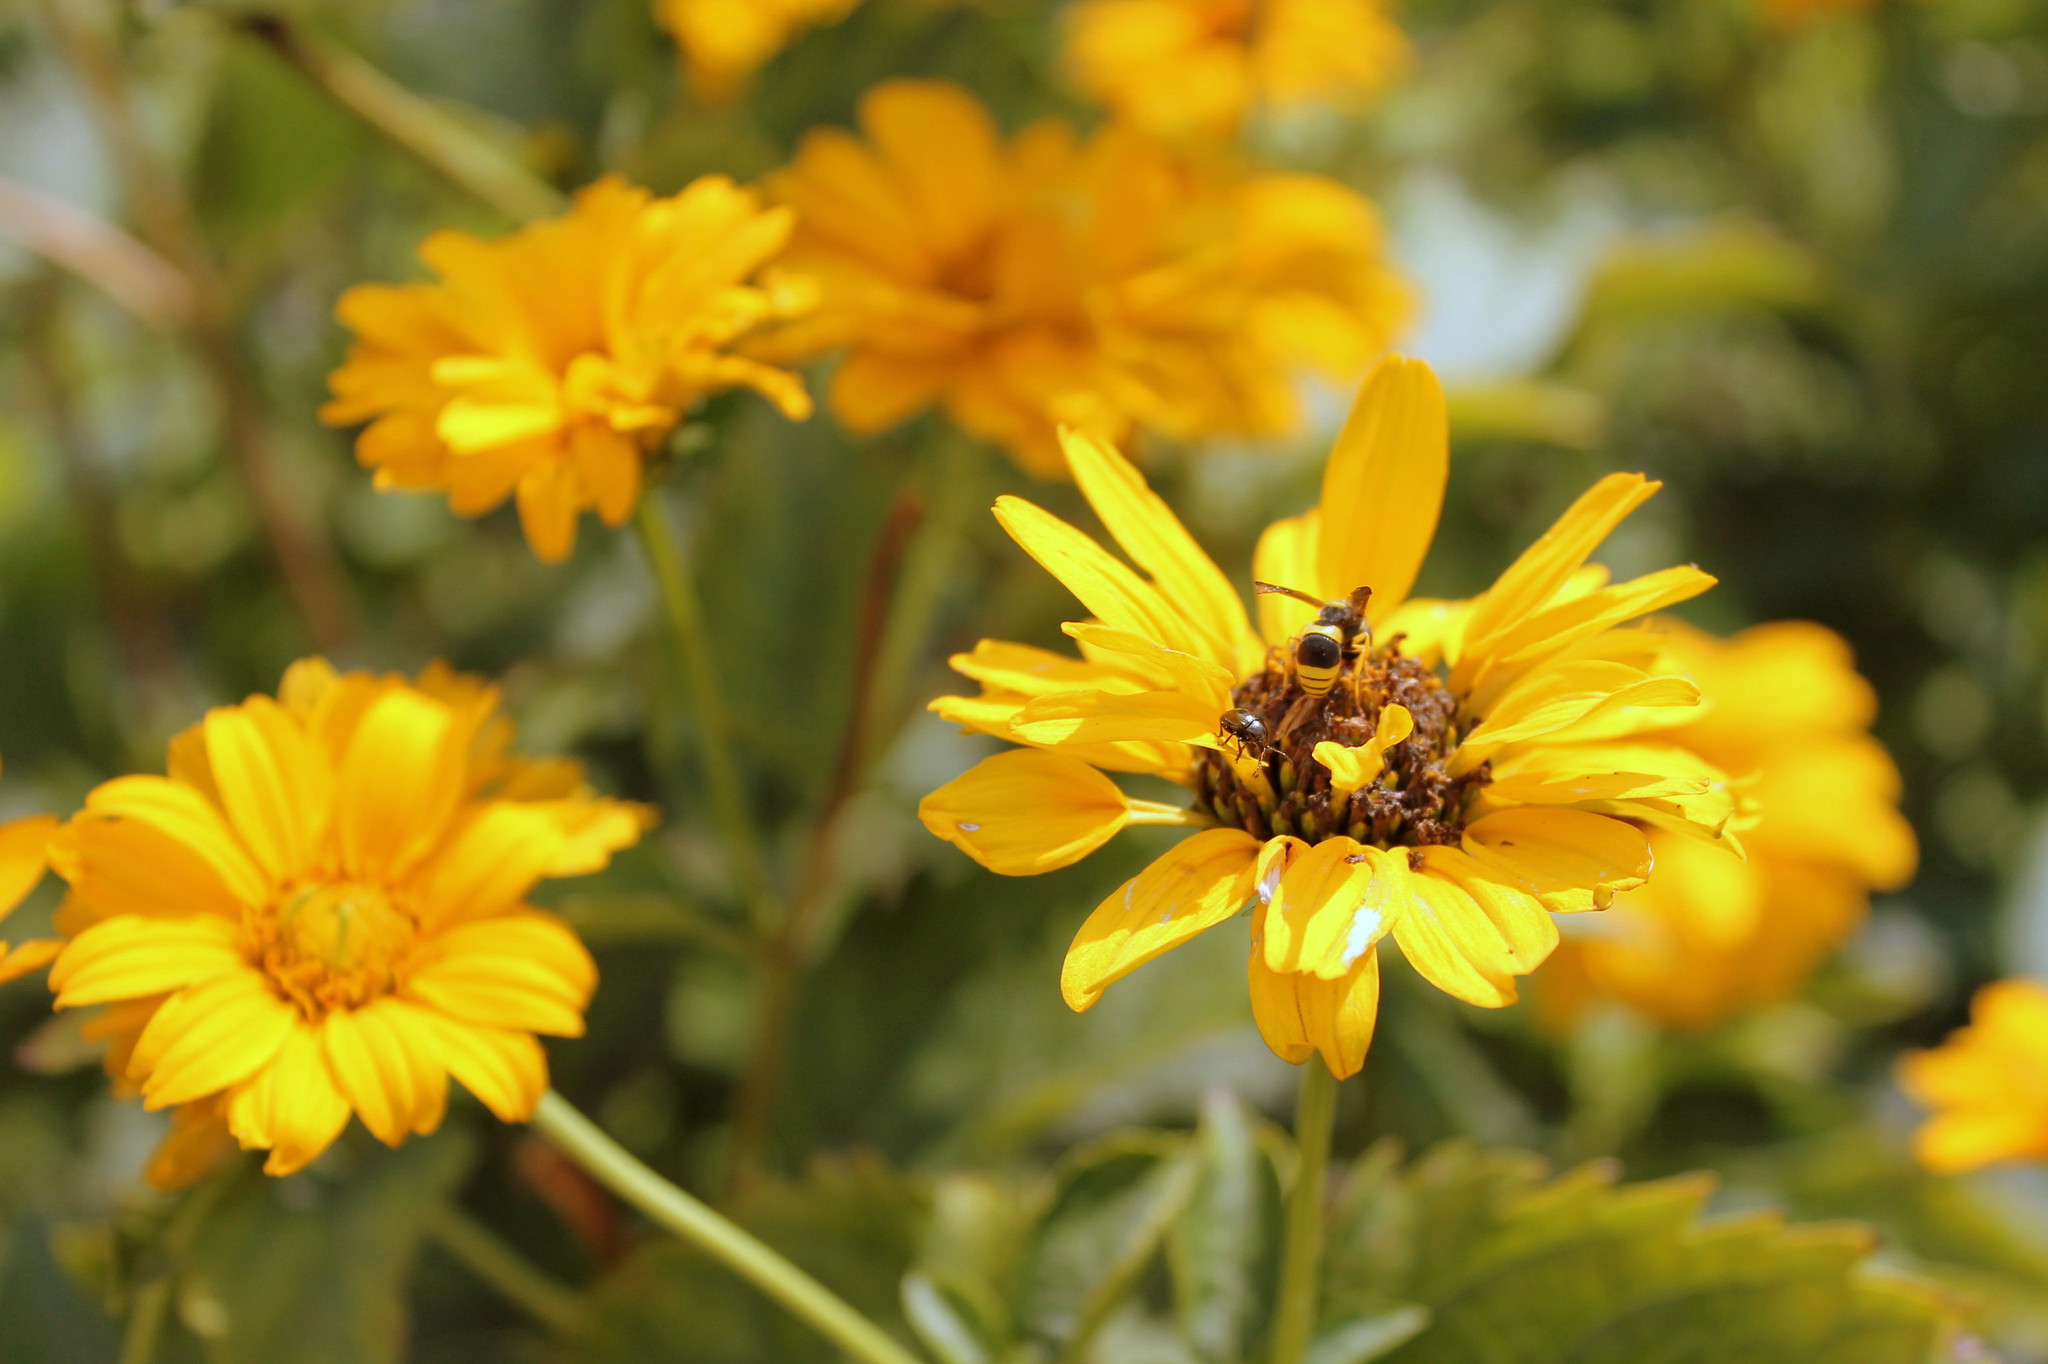
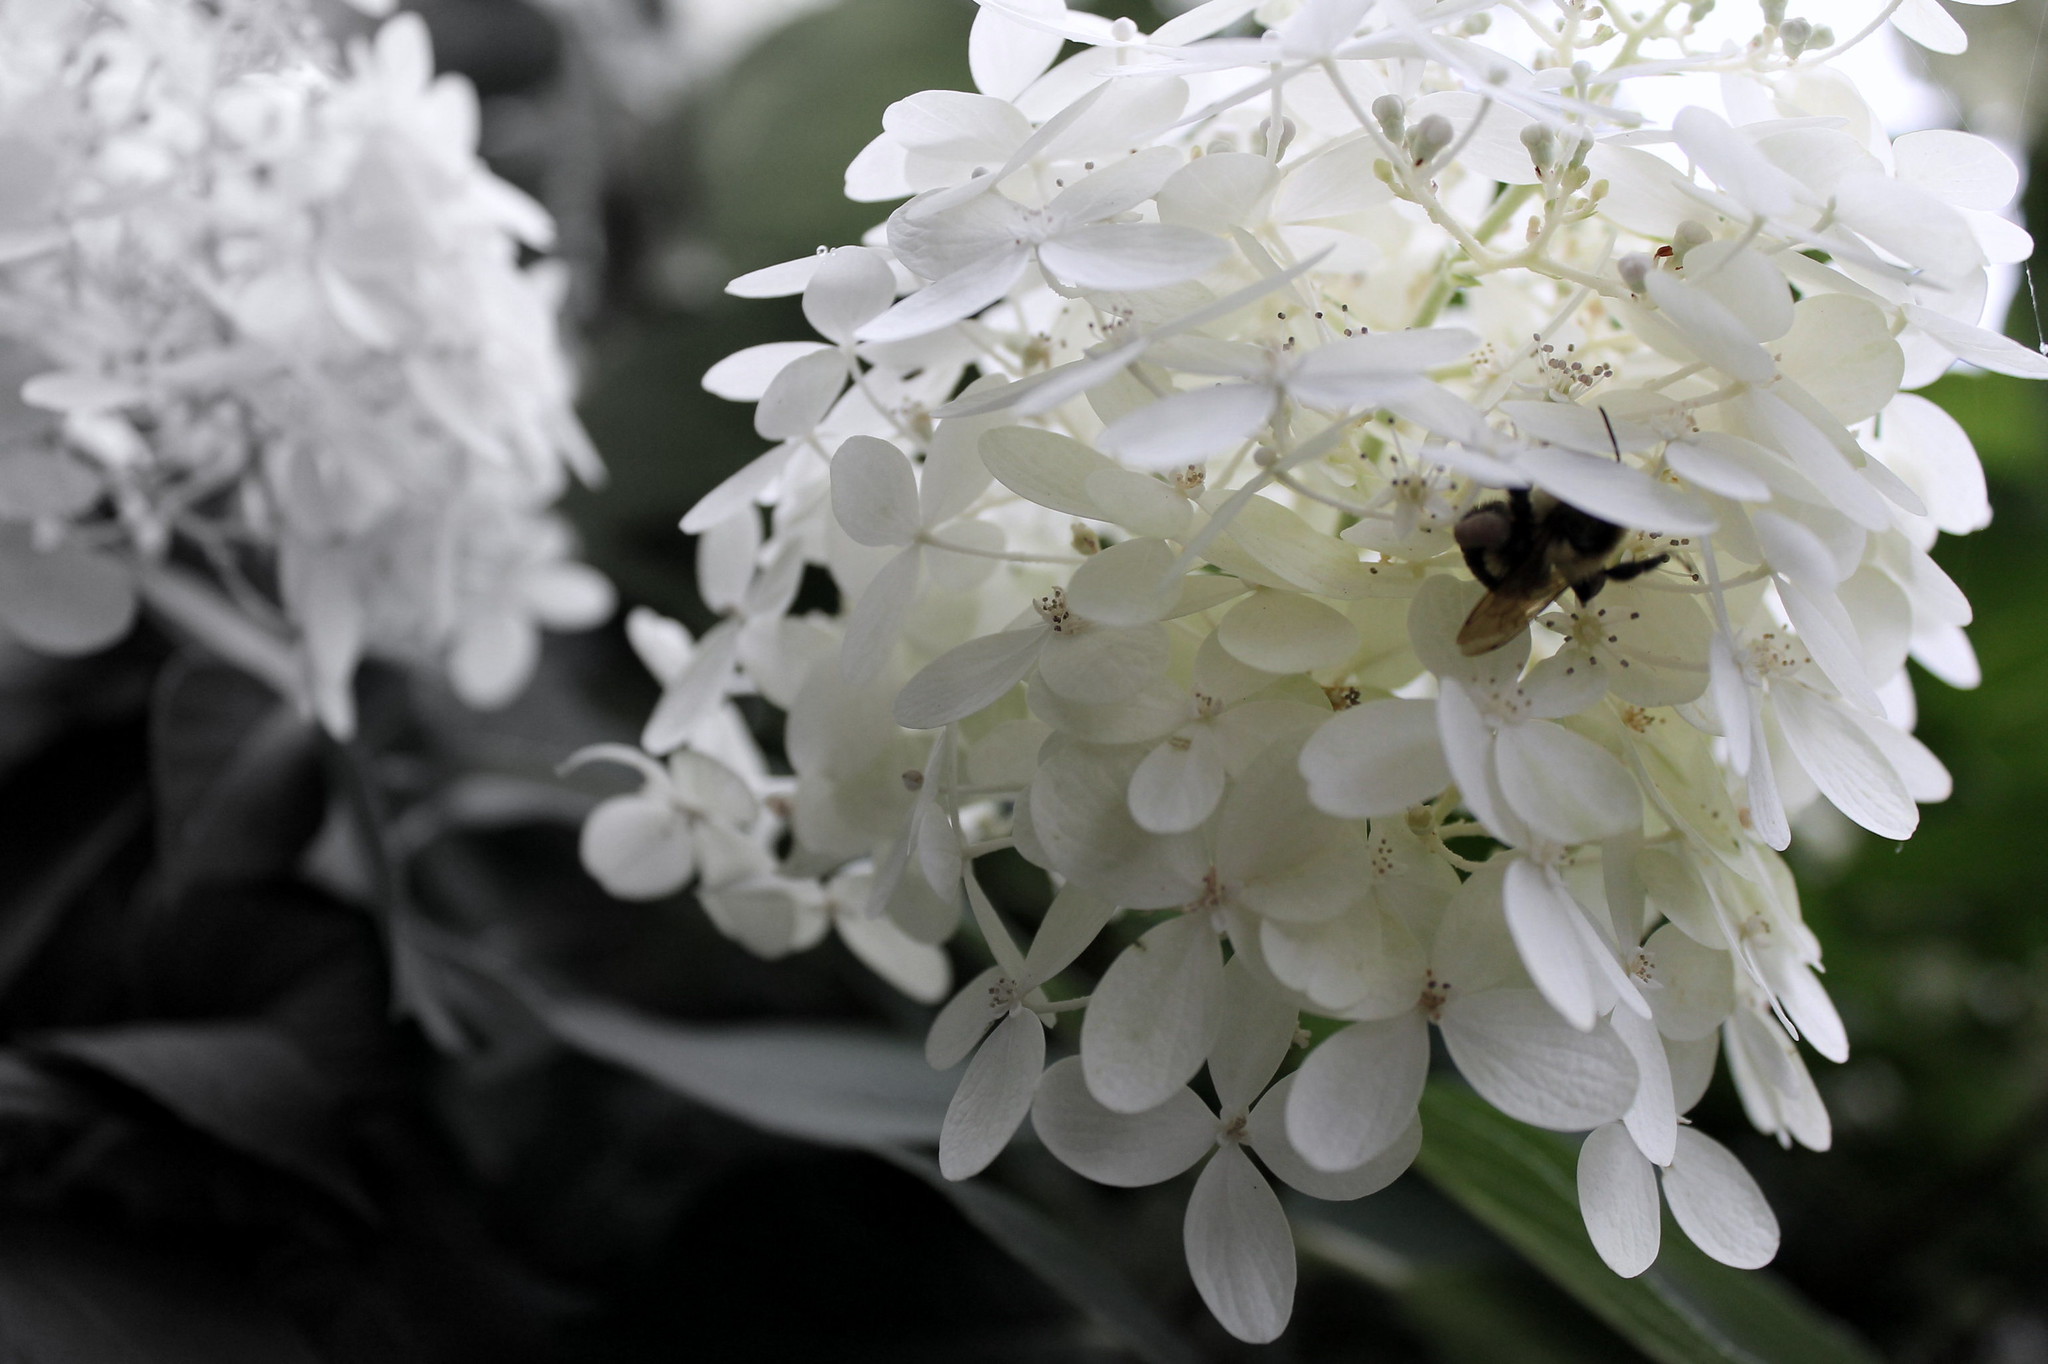
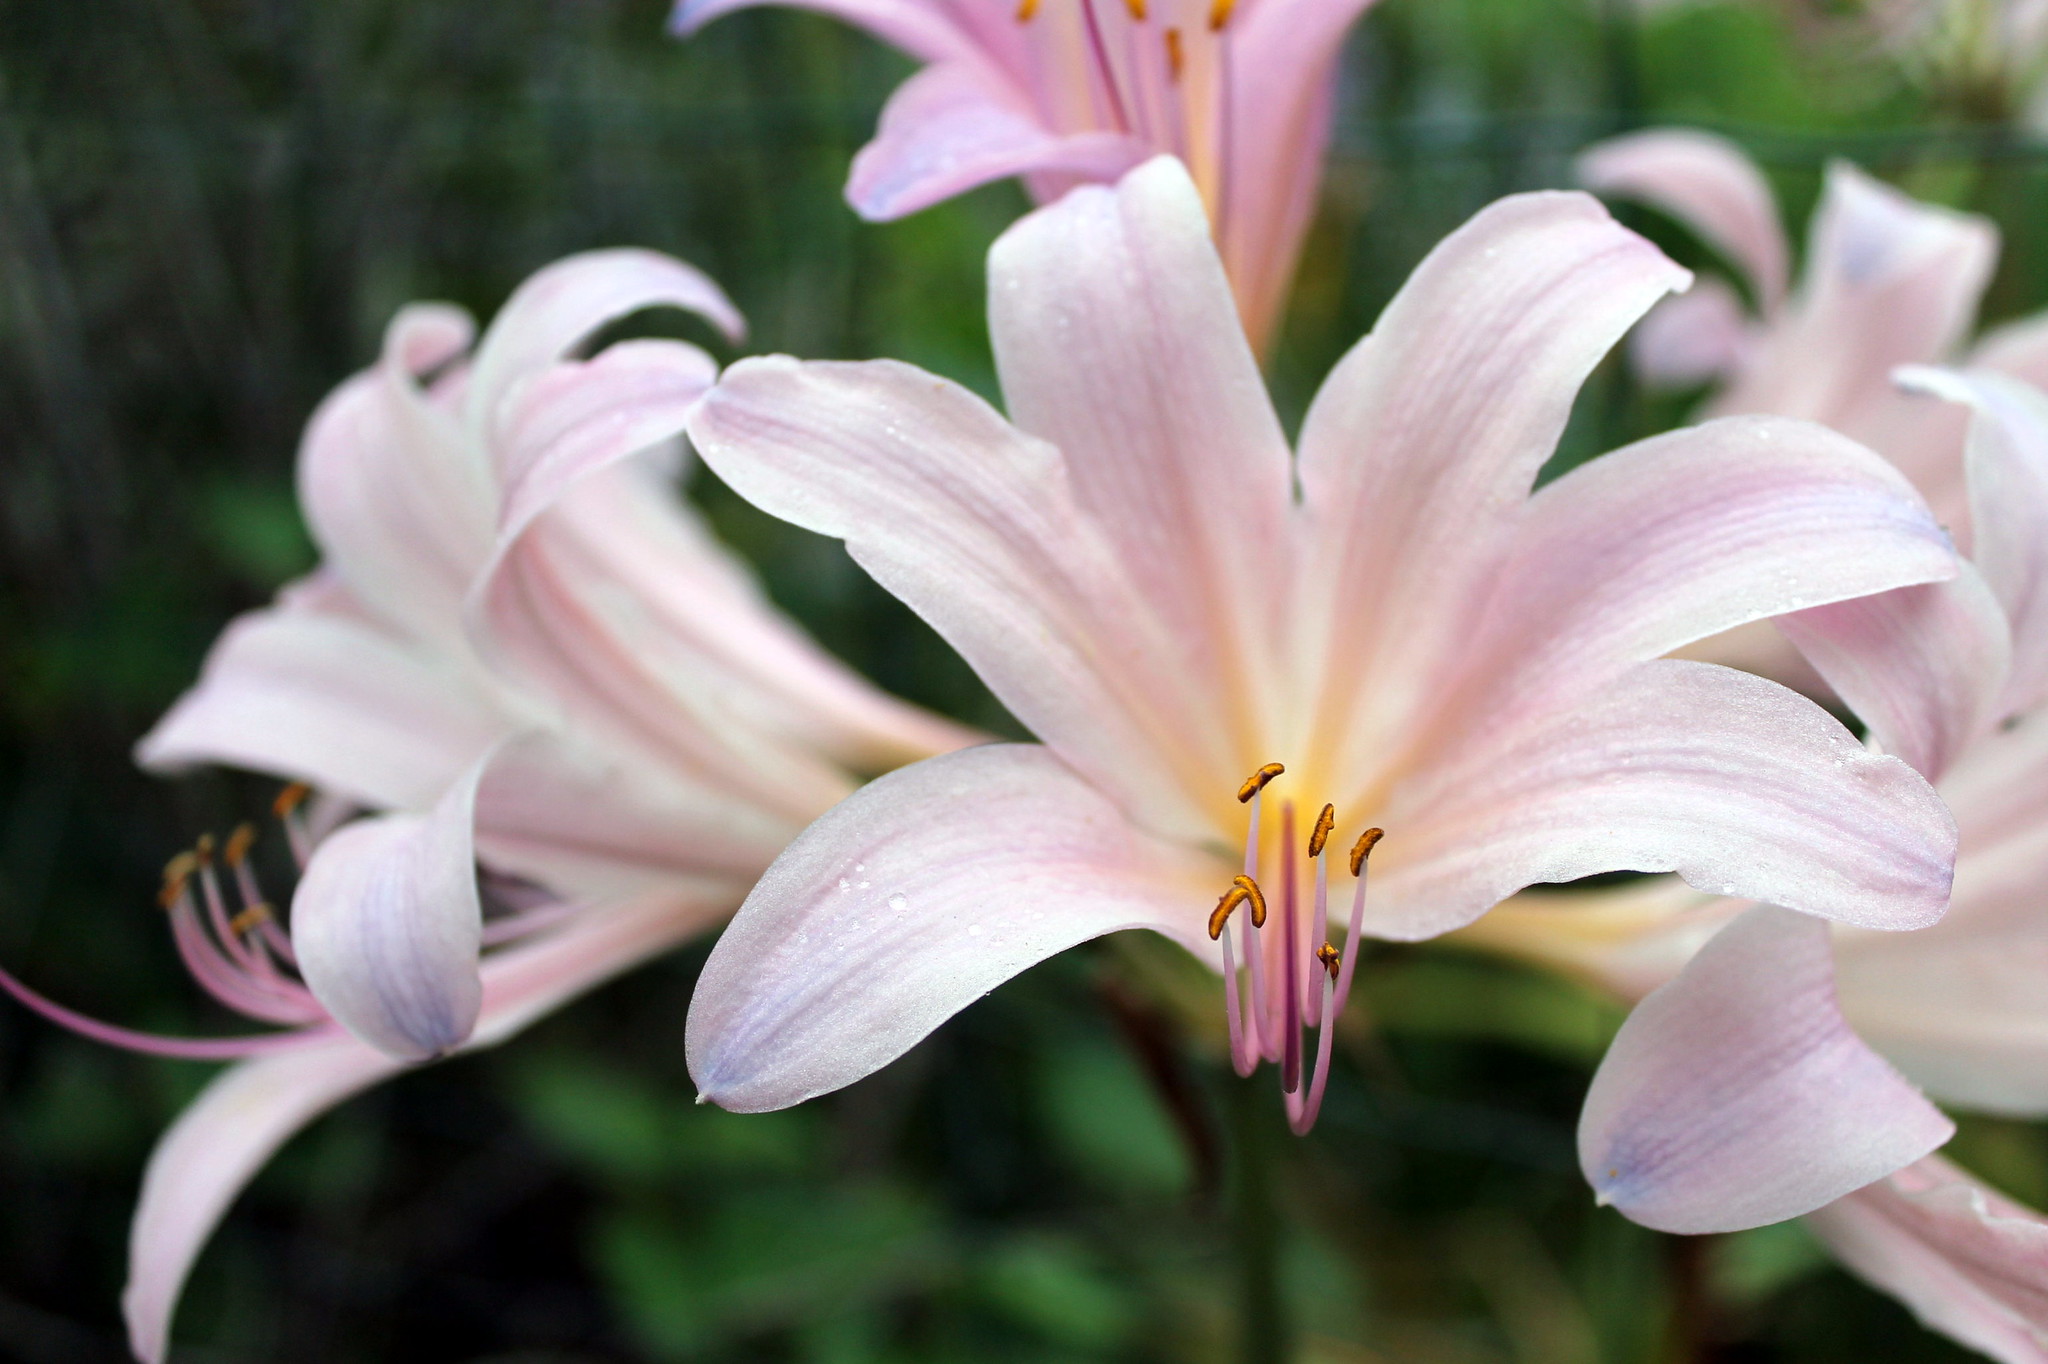
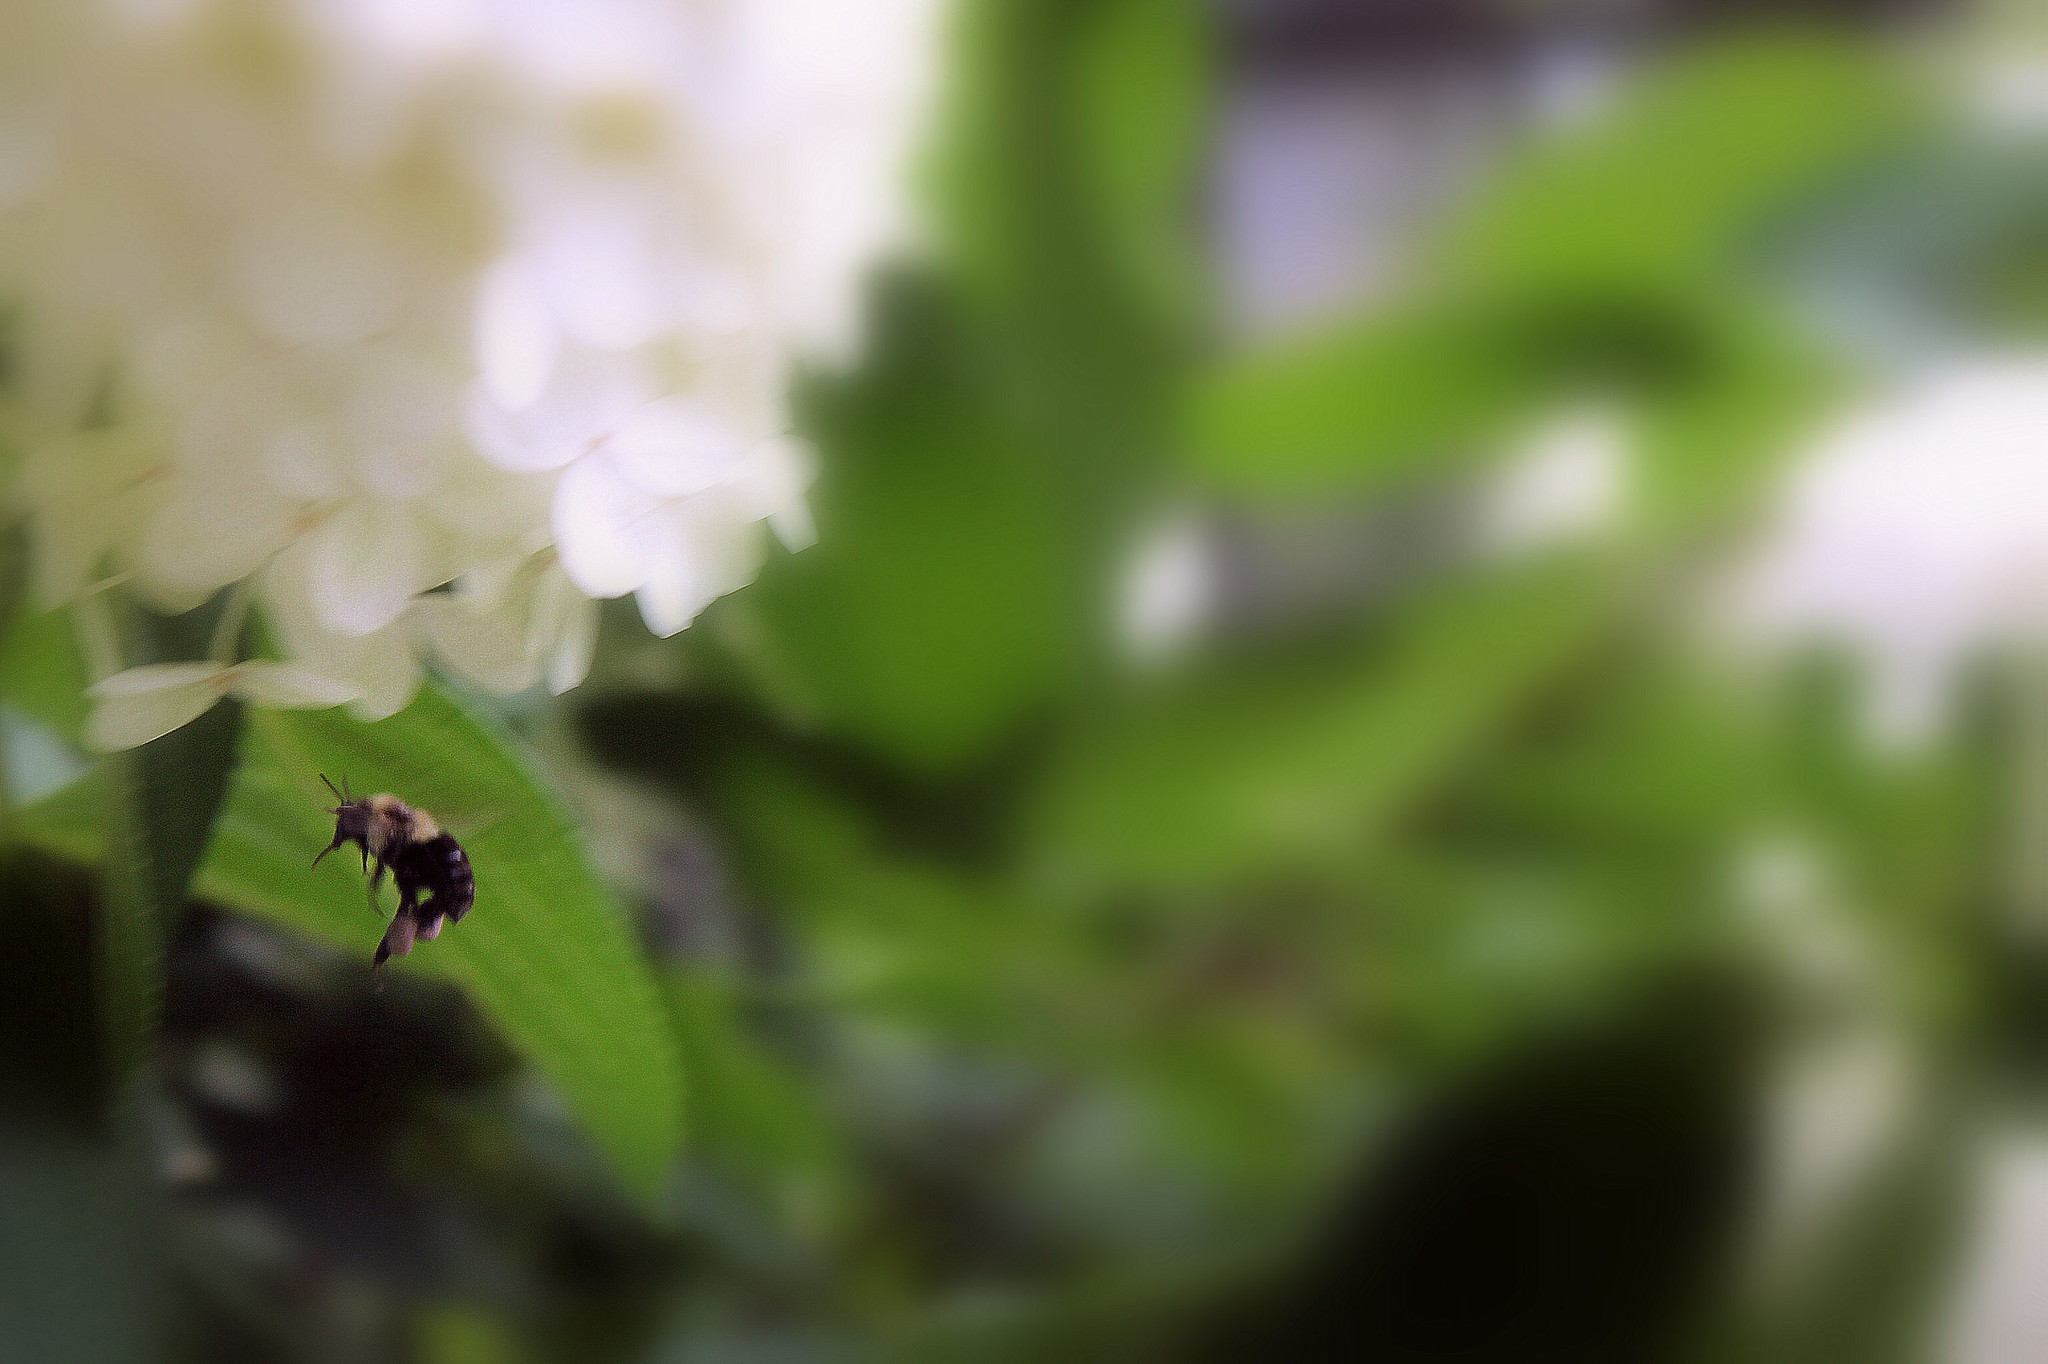
When I tell you that pretty much only 1 in 100 people near where I live have a garden that's not an exaggeration. Although my neighborhood is dominated by immigrants from Southeast Asia whose former livelihood was determined by growing their own food, few have carried on their growing to their new homes. The area just south and west of my neck of the woods is full of descendants of Italian immigrants who now rely on the ACME more for their produce. Granted, we all have concrete slabs for backyards (if you even are blessed to HAVE a yard) and flat fronted homes where you need to worry about someone either stealing or breaking your flowepots (sad isn't it). A few of us have been crafty enough to establish sorts of raised beds and/or utilize pot to grow some flowers and veggies throughout the warmer seasons. Others, for instance those in Center City regions, enter a lottery to obtain a spot in a community garden where they can grow herbs, produce and flowers. The photos above are from one such community garden near the Schuylkill River. Some days, if you are incredibly lucky, you can enter the garden if a plot manager is there tending to their beds (if you ask nicely and are, of course, only taking photos and not trying to sneak away some peppers!), but today the gates were locks so I could only snap a few photos from the plants in the perimeter. I did, however, snag a few of a fuzzy little bumble bee, which totally made my day.

A Trip to the Orchard: Peaches, Peaches, Peaches Galore!


This weekend we took a trip to our local orchard to do some peach and veggie picking. I had been itching to make some jellies and wanted to get out of the house and into some nature so we took a drive to Styer Orchards in Langhorne. We had been there once before and after our last several trips to Linvilla Orchards had been a bust (ignorant crowds, people stealing food, and high prices) I vowed to not waste my time or gas on the trip. Don't get me wrong, Livilla is cute, but it is more of a "tourist attraction" than anything and I kid you not, their fields are full of people who will literally camp out with their families and devour a hundred dollars work of fruit and vegetables out of the view of the workers and wander out purchasing maybe $8 work of anything to cover up their theft! As a result the honest-paying customers are not paying MORE than grocery store price. Plus, we also learned that they use high amounts of pesticides on all of their crops so that what actually makes it to the register is not inflicted with diseases. So, unless there is a good reason to drive there, I will not be paying $3.99 a lb for non-organic peaches that I have to hike out and pick for myself. No sir!

Now Styer's: I have to say, I absolutely love this little place. It is family run, super friendly, and just a plain old-style pick your own orchard. No fuss. No mess. Just rows and rows of fruits. There is also a cute country store at the beginning of the property that used to be part of the farm but is now managed by the township. We stopped in to grab some apple cider and a cup of locally-made ice cream from Goodnoe Farms. What a better way to perk up a cranky toddler than with chocolate ice cream, right?

We ended up with about 30lbs (easily) of fresh peaches, peppers, and tomatoes along with a few potted herbs for only $30! That's it! Needless to say I spent a good portion of yesterday cleaning and peeling peaches.


In all, about 20lbs of peaches were processed last night into yummy jams. My favorite has to be what I call my "local special" because it utilizes the two most abundant fruits in my region right now - blueberries (from Jersey) and peaches (fro Pennsylvania)! The recipe is super easy as it only has a few ingredients and takes very little time to cook up. I made twelve 8oz jars in no time! And, best off, the jelly set perfectly (unlike some other jams I have made in the past)!


I also made lots of plain peach jam (to my dismay had to be recooked due to, what I think, was either too little or bad pectin!) and some peach & strawberry jam. I love mixing berries into any of my jams and jellies. They are full of those healthy goodies, which, when you are consuming that amount of sugar in one tablespoon is something I need to remind myself of. Also, they just simply taste great. Below you can see the recipe I use for the peachy blueberry jam. Try it out for yourself!

Just some morning bike ride photos....

It's Vintage!


I have been going through so much clutter in the house and came across a handful of vintage items to put up for sale in my shop. Check out the ETSY SHOP for some super cute (and inexpensive" vintage magazines and knick knacks for your home! I am also offering FREE SHIPPING for ALL US ORDERS right now so hurry and grab 'em while they're hot!

Do It Yourself & The Concept of Urban Homesteading


About a year ago I started becoming interested more in the concept of urban homesteading and just overall self-sufficiency. I had seen some videos on YouTube of a family in California who have become almost entirely self sufficient on their small plot of concrete just outside of Los Angeles and I envisioned being about to do something similar in my little next of the woods. Idealistic, right? But being self-sufficient and being self-sustaining are two completely different things, and being that I live in the heart of the fifth largest city in the U.S. in a home under 1,000 sq. ft. with almost no backyard space, no budget, no access to wild animals or trees and more city restrictions that one can express without becoming full of rage, it is not exactly possible to grow the majority of my own food and raise my own livestock. I can't walk outside and get fresh eggs from my own chickens. I don't have the nearly ten thousand dollars it would cost to put up solar panels on my home. And I don't have the ability to grow a fully-stocked 365-day-a-year garden to feed my family and survive through the brutal winter we have been having. There are things, though, that I have found that I can do quite easily without burdening my budget or sacrificing modern conveniences.
I have found that creative people come up with and execute the very best ideas in self sufficiency. We are, for the most part, open minded and can usually adapt and find new uses for old things. Sufficiency isn't limited to the ideas of growing food, raising chickens and collecting rain water. It's about non-consumerism and limiting the amount of "things" you buy from foreign places; it's about fixing something up before throwing it out; it's about making something instead of spending twice as much for the same product that is not nearly as good ( or full of preservatives if we are talking about food ).

I couldn't express in one blog post the ideas, recipes, pattern, tips and experiences I have read and / or tried out. But what I can do is try to take you on my journey into learning new things one day at a time, one post at a time - trying to learn new things and rely less on the pre-fab world.

Free Artwork Downloads for Your Home

IMG_0986


Guess how much this adorable tree print was? If you guessed FREE then you are absolutely correct. A few years ago I discovered a site called indiefixx.com where I found their Free Art Project. As a part of the project one free digital art print was uploaded monthly to share to the rest of world (as long as it was for personal use). Not only does it help those on tight budgets bring some color into their lives, but it also helps promote artists trying to make a name for themselves.
I had already downloaded a few of the prints to furnish my living room walls, so when I began switching around the artwork in the baby's room I remembered this site and began searching for something. This particular print is from Angela Vandenbogaard. I did some Googling and found her portfolio here. I mostly love how it mixes natural elements with a modern style.

I had already had frames from the artwork which had already hung on the wall, so all I had to do here is print the photo and remount it.

Although there haven't been any additions since 2011, the website still has lots of great art ready to print. The only downside is that they are .pdf images, so if you need to re-size make sure you adjust your printer settings.

Chalkboard Dresser Tags

Since I already had an abundance of chalkboard paint from my table and chair project I decided to do another project this past weekend (especially since there was a lovely break in the snow and the sun was shining!). I had seen SignificantOthers'chalkboard painted wood slices before and wanted to do something similar for my son's dresser baskets. My son's room was previously a craft studio of sorts and I already had an IKEA EXPEDIT shelf which I simply added eight of the BRANAS baskets to create a lovely baby dresser. Being that my son's clothes are still rather small the baskets suit my needs just fine and I was able to eliminate the purchase of a proper dresser.

DIY Chalkboard Table & Chairs

About a year ago we bought Eamon a table and chair set from IKEA for about $20. It was a great deal, but as with kids (and surfaces from IKEA), it took a beating since then. I had rearranged a few of his toys from our living room area and taken his chalkboard to his room, but since the boy loves to draw on absolutely EVERYTHING, I wanted to turn his table set into a place he can sit and color and I wouldn't have to sorry about constantly cleaning up! So, for a grand total of $5.79, I took his scribbled up table and chairs and made them into a surface ready for Picaso-junior himself. Here's how:

Baby Room Makeover: Name Sign

name sign (1)

This project cost me a little more than I had initially wanted, but I was also able to utilize materials I already had around the home to make this cute name sign for my love.

While I was at Blick art supplies I came across these adorable little canvases and had the wonderful idea to paint Eamon's name on them and turn them into a hanging sign to place above his new shelf and some artwork I hung above this dresser. Since I am not a magnificent freestyle painter, I was on a mission to find some durable stencils that I could reuse for other projects and that wouldn't bust the bank. Luckily, they were having a sale and I was able to score stencils that normally $7.79 for a bit lower at $5.99. Not much of a score when you think about it, considering that I could have printed free stencils online, but I was in the moment. My idea was to spray paint the canvases using some leftover paint at home and stenciling one letter to each using some acrylics (which I have a huge stash of). I would then use some cheap art clips and some jute I had picked up at the thrift store a while back to create the hanging sign.

Baby Room Makeover: Mini Skateboard Shelf Project

As my baby is getting bigger I decided that it was time to redecorate his room (which is rarely used to begin with) to make it a little more mature and playroom oriented. Doing this on a budget can be a trick, especially since things like artwork can be pricy when you're trying to do the "handmade" thing. The trick is to use items you already have around the house to keep that cost to a minimum.

One of the first things I noticed in Eamon's room was a novelty mini skateboard I had bought him during the summer from Five Below. Since it is something that is not regularly used (given that he has only just turned 2 and we literally a dozen other boards in the house), I decided to put it to good use and mount it to the wall above the vintage Playschool Record Player I dug out from my childhood pile and set up in his room.

The project is really quite easy and requires minimal skill (so don't fret if you're not a master building!)Now, everyone likes to make their shelves a bit differently: some people use prefabricated bookshelf materials and some people go for simple braces; it's really up to you. I chose to use small corner braces because I was using a small board to begin with and didn't want it to be "clunky" looking.