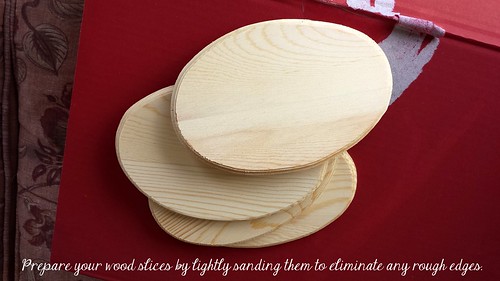
Recently Eamon began to show an interest in assisting me in putting away his clothes. In addition, the now-two-year-old is also fluent in his alphabet and is completely fascinated with letters and words, regardless of their placement - be it on a package, a toy, or in a book. I wanted to make something fun but still educational for him to help with his room organization. I found that the pre-made wood slices were very costly and needing eight I would end up spending quite a bit to complete my project. I visited my local A.C. Moore and found that they, in fact, did sell wood slices, by there, too, they were around $9 each and were too large for my needs. Living in an urban area, there are not many places I can venture out to in hopes of finding a large enough tree limb lying on the ground for me to cut. I did, however, find some oval-shaped wood pieces that were just the right size (around 6" in width). They cost me $.80 each - grand total $6.40! That was much better.
Here are the materials you will need:
- Wood cuts in your desired size (shown are 6")
- Sandpaper in fine grit
- Drill with 1/8" drill bit
- Chalkboard paint
- Jute or other strong string
- Chalk to write with
Directions:
Click on the photos if you have trouble reading.
 Make sure to let your paint dry completely before proceeding. I allowed mine to dry overnight.I also took it upon myself to paint BOTH the front and rear side of the wood slices for uniformity.
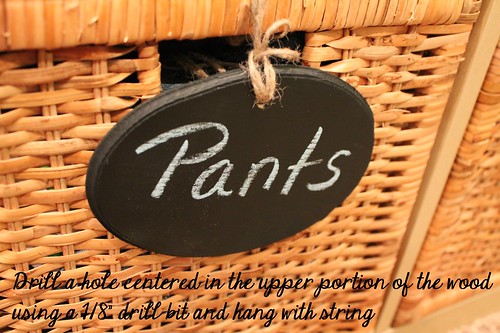 Now, your only task is to write all of your drawer contents...and to organize your baby's clothes (eliminating the ones that no longer fit, of course - my how quickly they grow!).
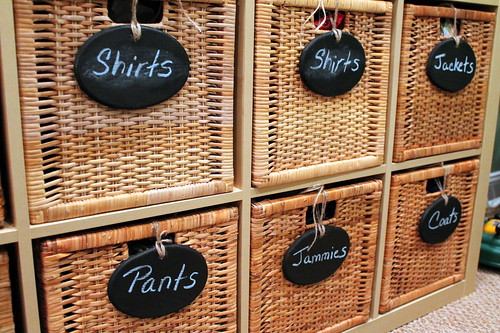
I am very pleased at how these came out. The size is perfect for placement with my basket and it makes for fun dressing time because it gives my baby something to read (and color on!) while I try to dress him. It also makes it easier for Daddy to put his clothes away in the correct drawer after wash!
TOTAL COST FOR PROJECT: $6.40
No comments