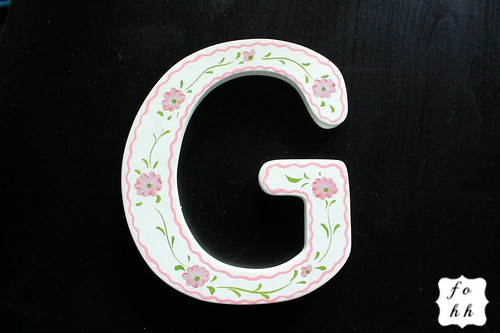
The original piece came from my husband's Grandmother's home in Avalon, NJ. It hung in out bathroom, but it's daintiness did not seem to fit the rest of the decor of the room. Needless to sayI decided to replace it with something more suiting (which also happened to be a piece from her home). It has been collecting dust and winding up in awkward places where it simply doesn't belong because I did not want to get rid of it. I also did not want to do something to it that might destroy it (just in case). So, I decided the rope wrapping was the way to go.
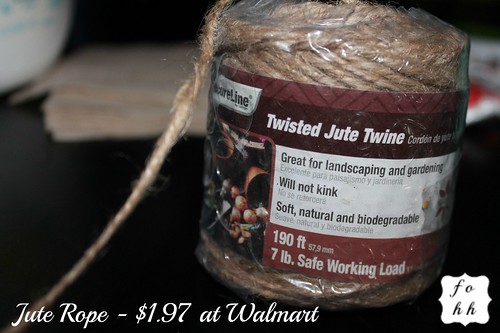
The entire project took less than one package of this jute rope, which I got at Walmart for $1.97 ( ca-ching! ). I usually keep a few of these around, but with the house in chaos right now (that's another story), I thought it easier to just buy another roll instead of ripping open boxes and bins. I like this particular rope for a lot of my crafts because it is unfinished. A lot of ropes have a wax-like coating on them which helps them "grip" as well as prevents them from fraying. Since I like my projects a little more rustic sometimes (pretty colors mixed with indie & natural elements), I want something that it going to have more texture. Other than that, the only supply you need is a hot glue gun or suitable glue.
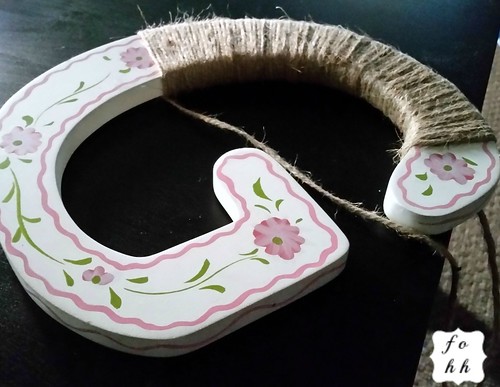
I began with the easiest part of my letter: the middle. As the girth of my letter is different than the tutorial, I opted out of the first step, which was to glue a strand around the perimeter of your letter.
When that was finished I took to conquer the tricky parts - the corners and ends. Wrapping in the corners can create a lot of bulky overlapping, so be careful. In these spots I applied some hit glue and applied the rope in a tight "wave" pattern actually wrapping it entirely around. After that I wrapped around this a few times to cover it up. I did the same for the ends, making sure to securely coil up my rope and apply a generous amount of hot glue to hold.
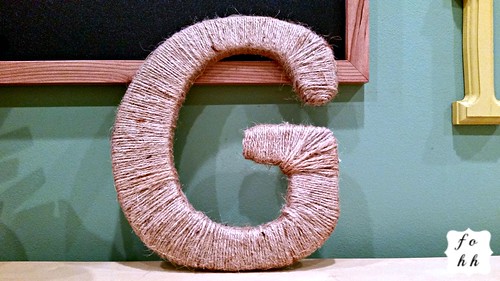
All in all I am pleased with the end product. With under and hour of work and under $2 in cost, I was able to take an old treasure and turn it into something new.
If you'd like some more inspiration on rope projects, check out this fabulous pin!
No comments