 For anyone who know me, I am always doing some sort of work and posting dozens of pictures on my Facebook showing off how proud I am of my accomplishments. Some girls take pride in their perfect makeup skills whereas I take pride in perfect brush strokes and straight tile lines. Not to say that make up can't be fun, but I find things that are a bit more permanent to be more rewarding.
Whenever I do post pictures I am usually met with questions of how I learned my construction-style skills. I assume because I am a girl that the traditional gender role attitudes growing up prevented these girl friends from learning how to create beautiful homes, unless, of course, they involved curtains and shams. Sad. Well, like lots of girls, I had fatherly influence in the field of cutting and hammering at a young age. When most girls had store bought doll houses my dad and I built one from scratch...literally. No kits, no pre-fab, just wood and carpet remnants. And the rest? Hours of the DIY Network and YouTube helped me figure the rest out.
When the hubby and I took a chance and gutted a good bit of the house about five years ago, not only did we find a lot of things that unexpectedly needed fixing (shoddy electric and blatant code violations for one), we also had to teach ourselves some things if we wanted to have the look and function we were after without having to pay the high price of contractors. For instance, I developed an admiration of stained wood. I flat out refused to work so hard on the house and have prefab white hollow-core doors from the Home Depot slapped back onto the frames. So, we scraped up the money for solid wood doors. To make the overall cost a little less, we decided to finish and install them ourselves rather than pay someone for a finished product...but it meant that I needed to learn a new skill.
Until then I never used any sort of stain or lacquer or varnish before in my life, and although I was quite intimidated at first, I found that it really was a lot easier that a lot of paint projects. Since then, I have successfully completed about 15-20 projects in the territory, all without any mess ups. Here, I hope to help anyone get over their uneasiness of trying a new staining project on their own with some simple steps.
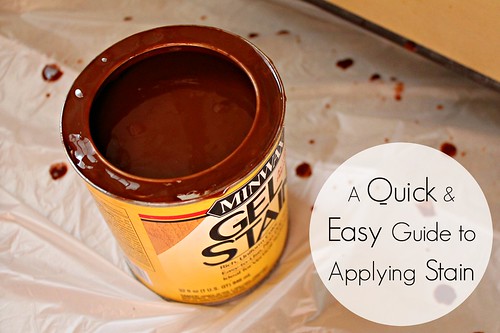
 YOUR STAIN: First you want to select the type of stain that is appropriate for your project. For instance, a regular oil based stain is good for wood projects, however, since one of our doors is made from fiberglass I needed to select a gel stain. You will also want a polyurethane finish to apply once your stain is set. A small can will do since you really are not applying a lot.
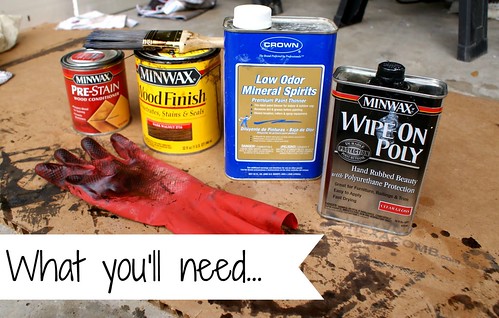
In addition to your stain and polyurethane finish you will need a few other items to complete your job. Depending on whether you are staining something new or an old, previously finished project, you will need different items. For now, lets focus on a piece of "fresh" wood, in my case a new door. In this case you will need some sand paper in two different grits: one fine and the other coarse which will be used to prep your surface. To apply the stain and finish I like a synthetic paint brush: one for each. You also want to have some lint free cloths, a tarp, painter's tape (if applicable) and a fan to ventilate the odor. Although I honestly despise working with gloves, I would recommend them. Also, a lot of sites recommend applying a wood conditioning to your piece. Honestly, I have never prepped my projects and found a good cleaning with some mineral spirits to remove any oils coupled with a sanding to be fine.
Let's recap: stain, varnish, polyurethane, natural bristle brush, synthetic brush, cloths, coarse sandpaper, fine sandpaper, mineral spirits, fan (optional), tape (if necessary) gloves (recommended but still optional),tarp.
Now begin!
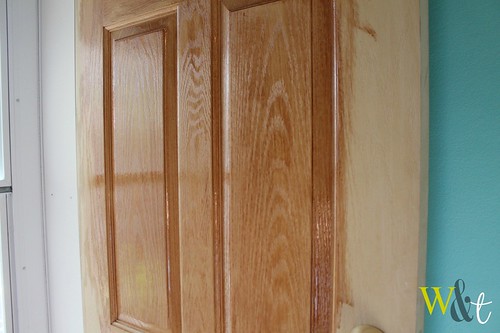
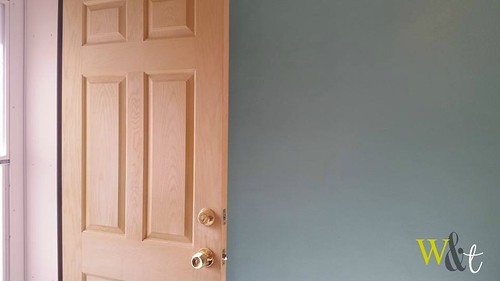 For reference, I present you with this lovely door that has remained hung in my home unfinished for the past four years. Unfortunately, it was purchased and hung right when I was pregnant and unable to work. Also unfortunately, it has remained unfinished since then and required some extensive sanding a cleaning to prep.
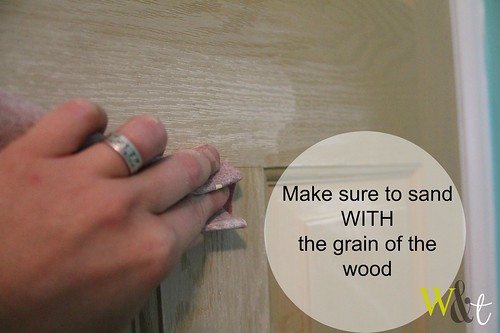 Check your surface for any sort of splinters, bumps, or other imperfections. Use your coarse paper and sand in the direction of the grain. Now use one of your cloths with some spirits and remove the dust. Repeat with the fine grit paper and give your piece some time for any residual spirits to dry.
Lie down a tarp and crack open the can, and stir, stir, stir!!! It is very important to stir your stain. Like salad dressings, your stain is built up of layers and will settle when they sit. You will have bits of pigment settled in the bottom of the can that will need to be mixed back in. You will also probably need to stir a few times during your project, depending on how long it takes you.
 Tape up your hardware with painters tape if applicable. Begin applying your stain liberally with your brush working with the grain. If you are working on a project vertically, as I am, do your best to avoid drips and dribbles in the corners if you have any (as seen below). Dab the areas like this with your cloth to soak in this excess stain. If you don't, these little drips can cake on and harden, especially after you apply your clear coat.
 If you want to have a deeper, richer tone, leave the stain on between 5 - 10 minutes before wiping it from the surface. For a lighter tone, wipe as soon as you are finished. When wiping, also make sure to go with the grain. After you are finished, allow your piece to dry. Time will depend on the type of surface as well as the temperature / humidity in the room or outside.
Here is my door with one coat of stain:
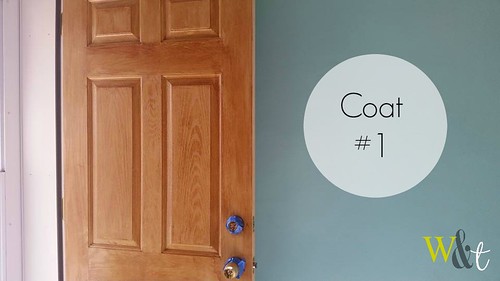
Lovely, right?
Although this color is nice and smooth and even, I needed to do a second coat to have it match the rest of the doors in the house. I waited about two hours before applying the second coat of stain.
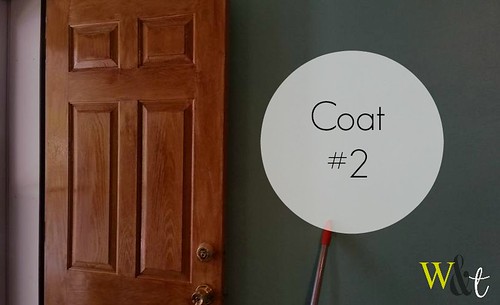
And here is coat #2. Notice how the second application of stain made the color more rich. This is exactly what I was going for: a rich, deep tone.
After the second coat of stain is dry, it is time to apply your clear coat. Personally, I prefer to use Minwax Fast Drying polyurethane as it supremely lives up to its standards. With a young child and pets in the home, anything that makes a project go a little quicker means that there is less of a chance of one of them messing it up!
It is an absolute must that you apply a clear coat to your household projects. Unless your stain included a finish, your piece will remain unprotected from the elements (weather, stains, and other forms of damage) if you do not apply a poly-clear coat. You don't want all of that hard work to get ruined, right? So, using your second paint brush, apply your clear coat in a fine and even coat, again working with the grain of the wood, but first, make sure that your surface didn't get any bits of dirt or dust caught in it while your stain was drying. You'll notice that the fumes of your polyurethane are much stronger that those of your stain, so keep that fan running and crack open the windows! Also, never shake your can of polyurethane. This will introduce little bubbles into your mixture that WILL show in your finished piece. A quick and gentle stir is all you'll need.
Spread the varnish over the entire surface with long, even strokes. Don’t use too much or you’re likely to get runs or drips and these are not as easy to clean up as any that happen with your stain. Try to overlap your strokes to get a clean, uniform coating. This will also help to catch any drips that may happen. Allow your first coat to dry and inspect. If you failed to catch any runs or drips in the coating, use a razor blade and gently cut them away. Apply a second coat if desired and wait 24 hours. Should you still see any blemishes in the coating, use a tiny bit of damp sandpaper to gently rub them away.
After about 48 hours you will know if you need any additional coats. I have never personally used more than two coats on a project before and have been fortunate enough to have been blessed with a steady hand and a good eye to avoid any mishaps.
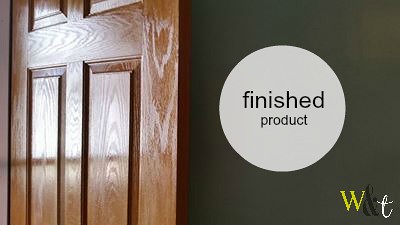 Above is a photo taken 24 hours after the completion of my door. This was my first time working with fiberglass as opposed to pine or oak, however, the process and curing time remained identical to all of my other projects. The entire process from start to finish took me about seven hours to complete: two hours in between each stain application due to the humidity that day plus the time for my clear coating.
I hope that this tutorial was helpful and help your overcome any fear or anxiety you have about trying your first project. Staining really is a wonderful alternative to painting in many cases and allows you to experiment and create certain moods or add nostaglia to a piece once you get the hang of it. If you have any questions don't hesitate to send me a message and check out the rest of the projects in the blog or on my Pinterest for some inspiration.
Well, I read your blog, this is excellent blog. Thanks for sharing us.
ReplyDeleteThank you for reading. Glad you found it informative.
ReplyDeleteThis comment has been removed by the author.
ReplyDelete