Yes, I know... this post is a few days late, but I hope everyone had a fantastically fun filled Halloween out there. Despite the evening getting off on the wrong foot ( E didn't want to wear his costume! ) we got to enjoy a night filled with tricks or treats...well, really just the treats.
I spent the Thursday before baking lots of candy corn cupcakes, making chocolate covered pretzels, and filling treat bags with all kinds of goodies for Eamon's annual school party and putting the finishing touches on his costume. With a child who hates wearing anything on his head, I needed to make a few adjustments to what was to be the chain mail ( I think it is called a coif )and crown in order for it to fit just right. Come Friday morning, however, we chose not to send him to school in his "special" costume for fear of it getting ruined. Instead, he simply revisited his Doctor Who hat an scarf for the day, which was fine because it is still absolutely adorable.
Although he was totally into wearing his hat and scarf all weekend, come Halloween night it took lots of coercing to get Eamon into becoming a knight. After promises that he would be seeing his friends trick or treating and mommy putting together a last minutes costume for herself (I was an old-time bandit like the ones Ralphie shoots in the Christmas story with his Red Rider BB gun - which is probably Eamon's favorite movie) he finally set up in his costume and we headed out for tricks or treats and a few visits to see friends and neighbors. We covered about seven or eight city blocks before his little feet tired out and he was tired of wearing his outfit. Even though the only candy he eats are plain chocolate bars (he has never actually cared for anything sweet), he was excited to dump his pumpkin of candy onto the floor and show off his treats.
I was pleased at how the costume came out over all. The crocheted coif was a bit difficult to eyeball without a pattern, but when you're trying to save money for more important things, spending $30 on etsy for a similar hat just wasn't warranted since I could easily make it myself. The crown was actually made from the leftover fabric from the curtains I made for Eamon's room a little while back, so I lucked out having to but any more material.
The next few hours were sparingly filled with kids looking for something sweet. I made close to 200 treat bags and since Halloween was on a Saturday I though we would get swarmed with kids all evening. It was quite the opposite. Before sunset most of the young kids came out and by about seven o'clock the trick or treating was pretty much over (except for the ignorant teenagers demanding candy without costume). I was really disappointed in the lack of children and their obvious lack of enthusiasm in the whole holiday. Few kids really seemed "into it" and even fewer parents showed any effort. Lots of last minutes Spidermans and Batmans with very little in between. I feel really sad about this. Maybe it's living in the city that has turned kids away from the uniqueness and individuality of the holiday; maybe its lazy parents; maybe its a generation of entitlists being raised to expect heaping rewards with little to no work involved; either way, I hope that the rest of the world's Halloween doesn't become like this. You see lots of creativity in online posts and blogs, but sadly the reality of the holiday feels like quite the opposite. But enough of feeling like a Negative Nelly...it's time to start brainstorming for next year's costumes!
Halloween Recap!
Wednesday, November 4, 2015
Labels:
All Around Philadelphia,
Crafts,
DIY,
Halloween,
handmade,
Knight,
What I Made
Things I Found Friday: #3
Friday, October 30, 2015
Five new finds from this week:
Chalkboard paint under an overpass with some inspirational wishes from nearby students.
Still loving this mural and community garden along side one of my favorite coffee shops.
Iron butterflies in an artistically designed planter box.
This mural panel installation on the SEPTA Substation East Passyunk in Philadelphia from Donna Backhues, which depicts the progress of South Philadelphia from the 1700s to today. Personally, I think it is more of a reflection of immigration to the city from then 'till now. There are supposed to be five panels, but only four have been installed. Funding problems as usual.
And this adorable/creepy cherub with two fish? I passed this before and was always a bit confused about it. It is part of a concrete staircase that must have had some meaning before and got lost in transition.
Fall Inspiration
Thursday, October 29, 2015
"In the garden, Autumn is, indeed the crowning glory of the year, bringing us the fruition of months of thought and care and toil. And at no season, safe perhaps in Daffodil time, do we get such superb colour effects as from August to November."
"How beautiful leaves grow old. How full of light and color are their last days."
- Rose G. Kingsley, The Autumn Garden
- John Burrough
Every leaf speaks bliss to me, fluttering from the autumn"
. - Emily Dickinson"
"Autumn asks that we prepare for the future —that we be wise in the ways of garnering and keeping. But it also asks that we learn to let go—to acknowledge the beauty of sparseness."
-Bonaro W. Overstreet
Labels:
Autumn,
fall,
Inspiration,
Photography,
Poetry
Halloween Treat Bag Ideas & Free Printable
Monday, October 26, 2015
Halloween has always been a commercial holiday, obviously, but the past few years I have noticed that it can cost as much as Christmas! Candy is easily $10 a bag and with a few hundred kids (easily) wandering through the neighborhood (Lord, I wish I were in the burbs sometimes), you can charge up a good bit in treats alone. Then come costumes and decorating and parties and school treats...it can be overwhelming...fun, but overwhelming, especially when you have a full plate and are on a budget.
I have to admit, though, that I can go overboard when it comes to trick-or-treats. I adore Halloween. I think it's the artist in me coupled up with the sights and smells and colors of the fall that make it so fun and magical. One year I printed about a hundred treat boxes I had downloaded from the Martha Stewart website and stuffed them with candy and spider rings. (I used old manila three cut file folders they were throwing out and recycled them into the boxes.) I also made plush felt ghost pins and little stuffed toys for all of the kids on my block or for a special treat for the kids with disabilities who came around that (oh they loved them so much!). I spend hours trying to make things extra special, although most of the time I honestly think that the majority of the kids who come could care less. :(
It's a lot harder now with a different job, cramped schedule, and a young child, too, so I always try to look for ways to make the holiday a little easier for me. A few years ago I found something a little more thrifty and a lot easier to make treat bags with: cello bags. Cello bags are the perfect size to fill with treats, can be decorated nicely, and are only around $2 for a hundred. Plus, they are always in stock at any craft store and any extras can be used up to bag other homemade treats like pretzels and homemade candy. Last year, while introducing myself to the wonderful world of Pinterest, I found the most adorable chevron print-outs for them too from The Unoriginal Mom blog and I have used them for the past two years now to make my bags (although I do not use card stock since I print so many).
my living room floor the other evening
This year I needed (like really needed) to stay within a budget for my treats and luckily the Walmart near us has bagged candy for $8 - $10 a bag with around 200 - 300 pieces in each. Granted, they're not Snickers bars, but I tried to doll them up a bit by adding some stickers, rings, and temporary tattoos I picked up at the party store. Some of them also have super balls and play vampire teeth (these ones are for the bigger kids, though) that came in a big packet from Walmart for $4.99 (there are also bubbles in them as well, but I saved these for my son's school). I spent about $32.00 for three big bags and one small bag of candy and another $10 - $15 on the other pieces, which means, I was able to stay within a $50 (almost half of what I spent last year) budget for all of my goodies!
*** TIP: Pick up lots of goodies a the end of the Halloween season cheap from your local craft stores. ***
Over the course of two nights I sat and snipped and stuffed until I completed nearly 200 goodie bags, which are for the regular trick-or-treaters. I still need to come up with something special for my son's class (cupcakes are definitely in the works..and maybe some candy pretzels!!!) I also need to hit the treadmill since I keep sneaking all of the laffy taffy. :)If you are looking for some inspiration for Halloween treats, I found a great post from Eighteen25.com with lots of printables as well.
What do you do to make the holiday special?
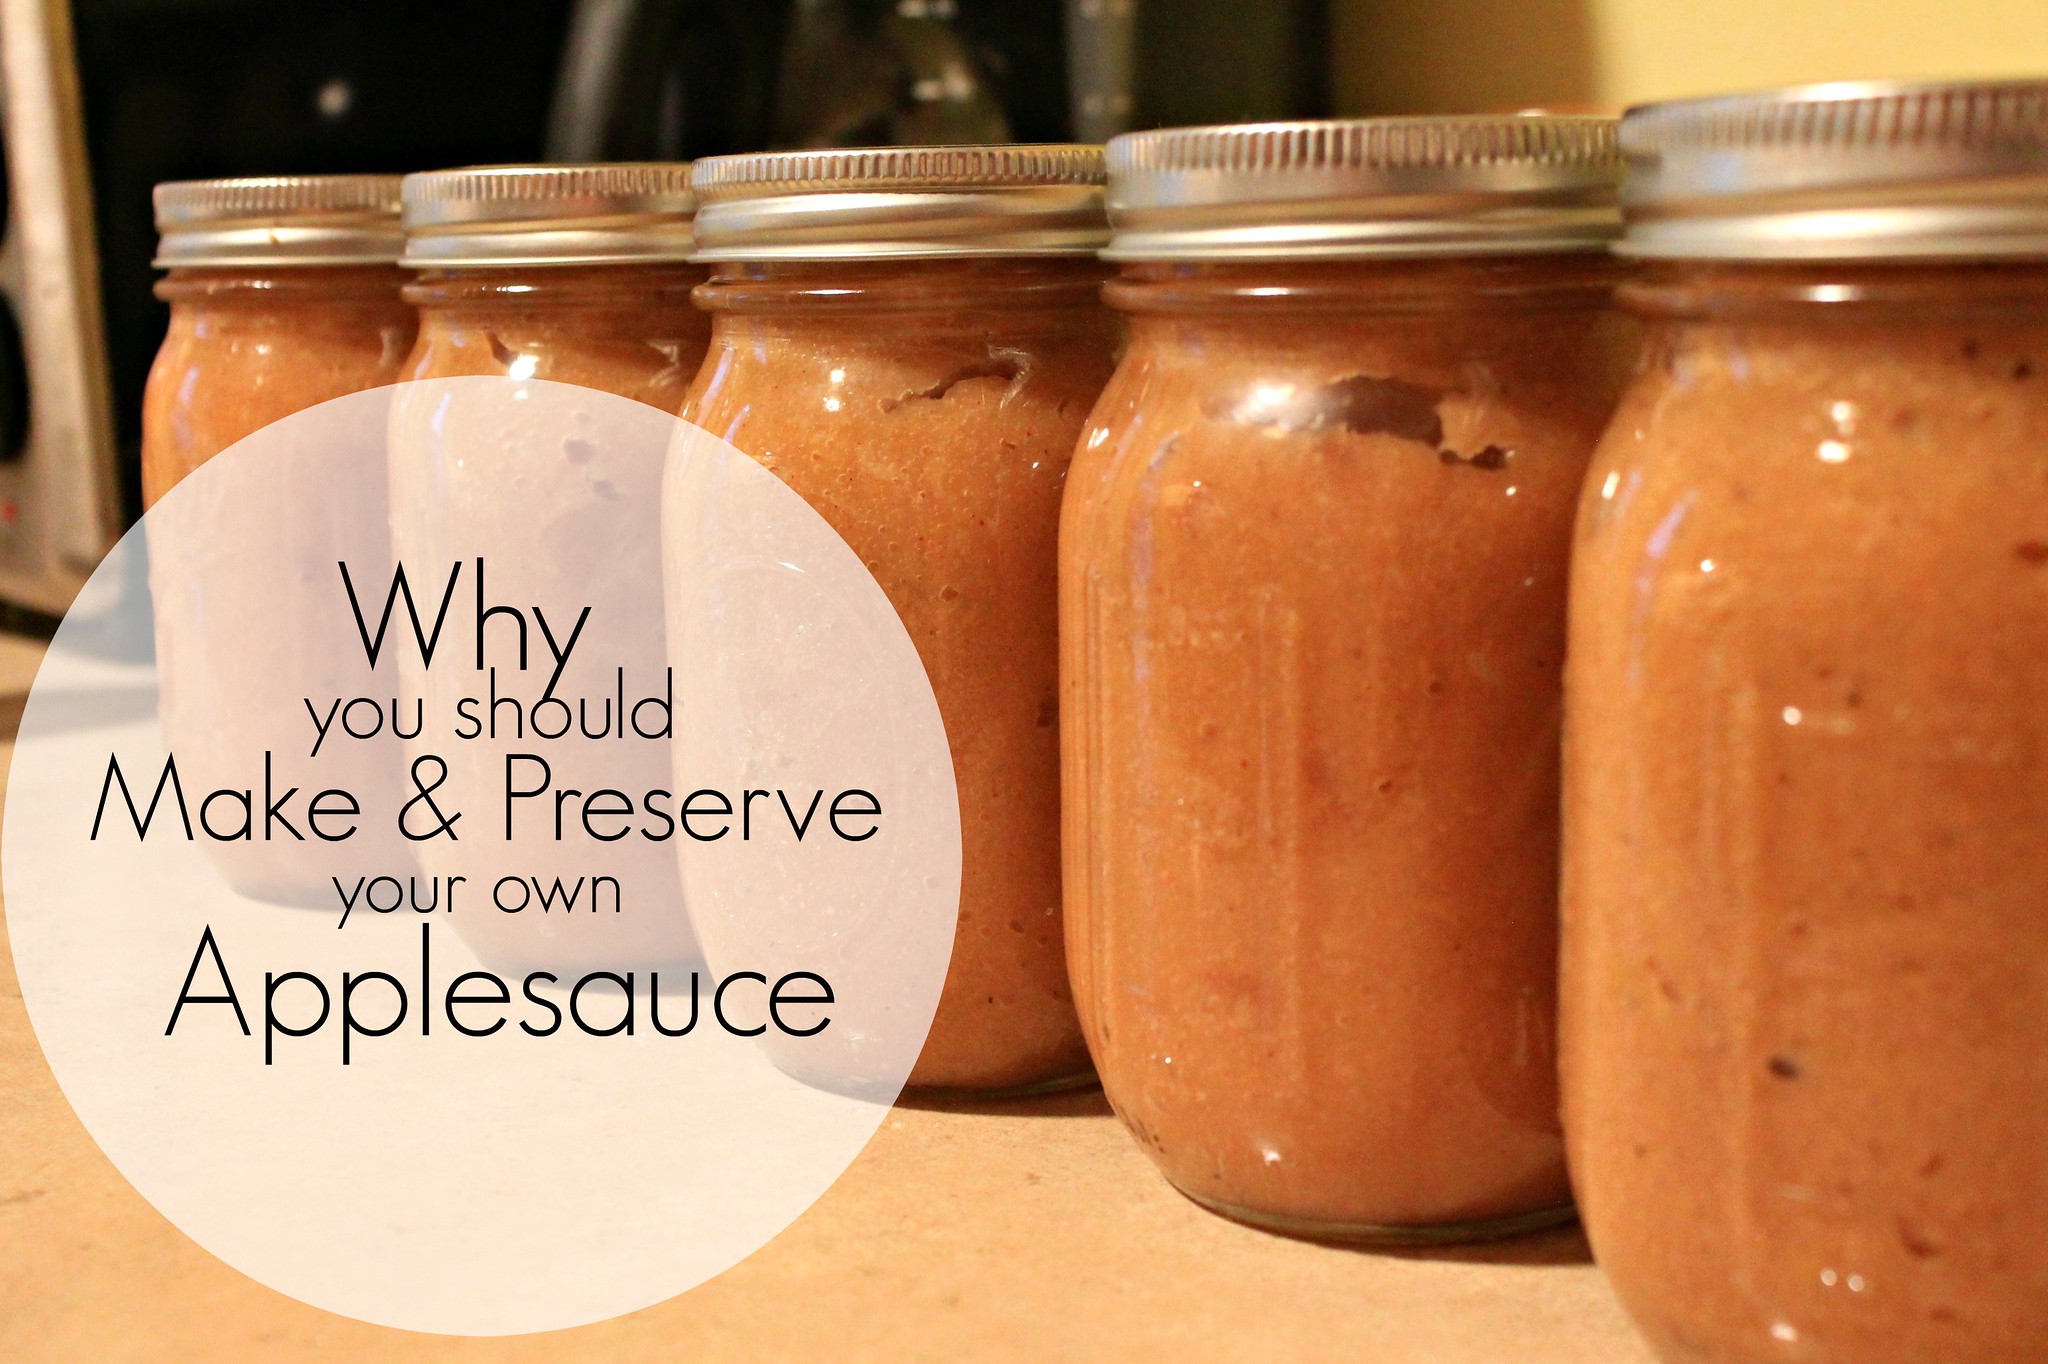
Why You Should Make (and Preserve) Your Own Apple Sauce
Monday, October 19, 2015
When starting off canning, a lot of people like to jump right into jams and jellies when there is something much easier and much more versatile to get your feet wet with: applesause.
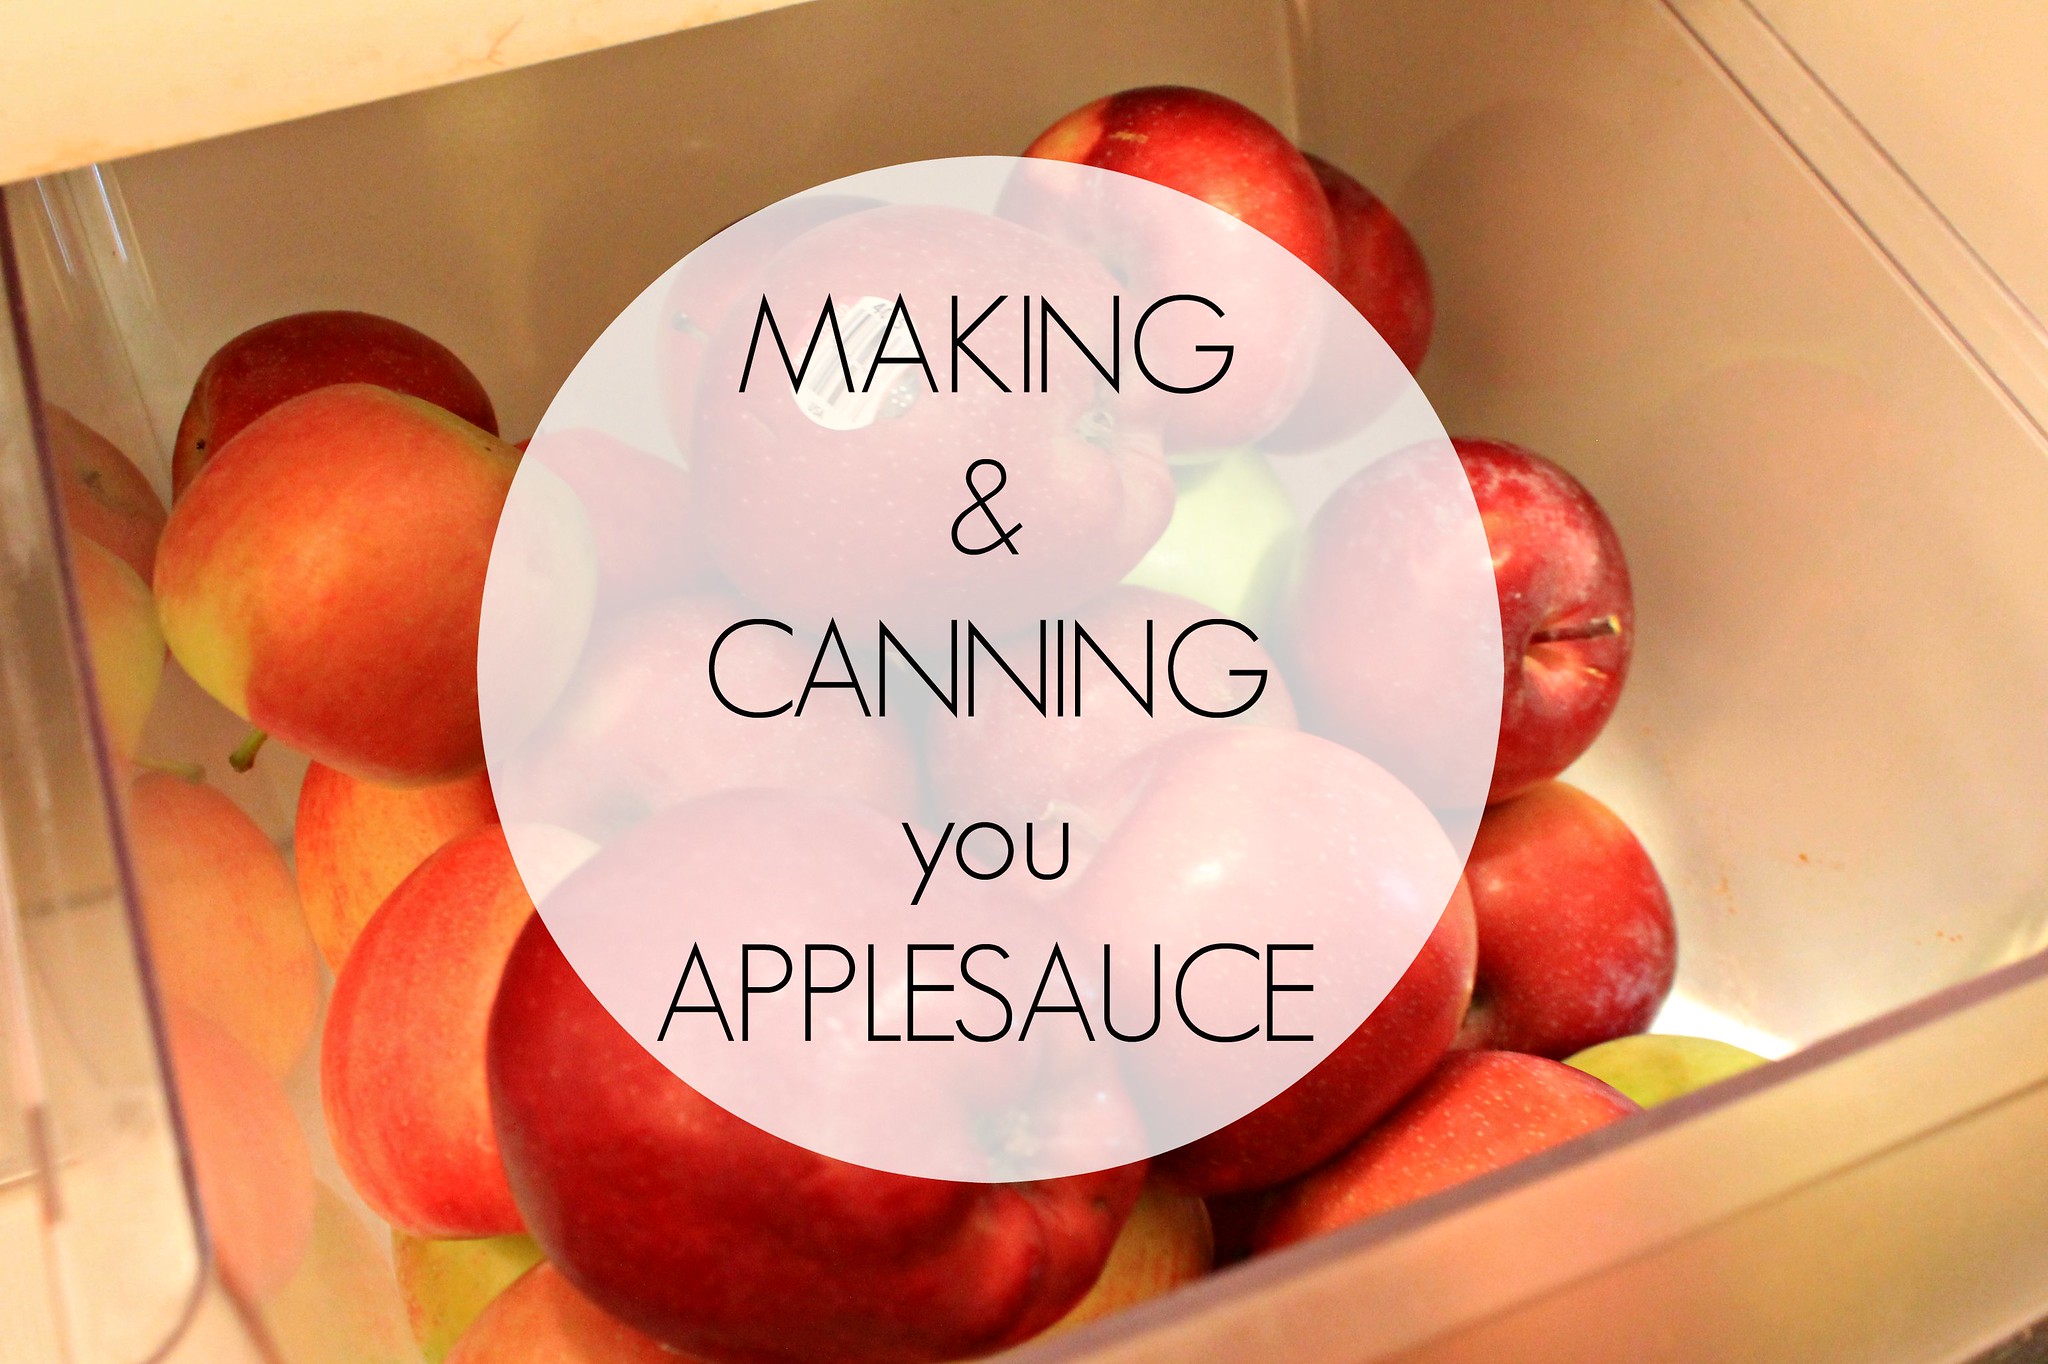
Fall is such a wonderful time for apples. The orchards are plentiful and nothing beats the fresh aroma of cooked apples: whether it be a pie, a bread, a jam or a sauce. In addition, apples are economically reasonable, especially if you are lucky enough to have a pick-your-own orchard or a tree of your own. Even in the markets, apples usually range around a dollar a pound for the conventional varieties which makes them a good target crop to experiment with.
Why Applesauce You Ask?
Applesauce is one of the easiest things to make....ever. You don't even have to peel the apples if you don't want and you can mix and match any variety (although I don't recommend using tart apples such as granny smith). It is also a great way to use any of your pickings that are not getting eaten quickly enough and to use up any "fallen" product from your own or an orchard tree. (Some orchards will allow you to purchase the fallen products at a discount price.)
Applesauce also has a million and one (maybe not literally) uses. The Pioneer Woman's Blog has some of my favorite uses already outlined and sure to cause slight salivation whilst reading. In addition, sugar free applesauce is an excellent substitution for sugar in many baking recipes and can be used also to substitute egg for vegan baking.
Check out THIS LINK for some health substitutions for baking.
"Why should I make my own when I can get a jar at the market for around $2?"
Well, for me that's an easy one: sugar! sugar! sugar! I absolutely despise the super-sweet applesauce from the commercial companies such as Mott's and the store-variety brands. They like to market their products as being a "healthy snack," when in fact there is little apple left once they've gotten their hands on it. For instance, a serving of 3.5 ounces is just 100 calories, however, 88% of the calories are from sugars (the equivalent of 5-1/2 teaspoons) and there is only 1 gram of fiber, where as a regular sized apple may have the same amount of calories, but four times the fiber, around half the sugar, and no artificial sweeteners. It is also rich in nutrients and antioxidants compared to applesauce.
In addition, you can choose what you put into your applesauce...and not only just the apples. For instance, you can spice it up with some cinnamon and nutmeg or add a splash of vanilla, or, my favorite, cardamom. Experiment with small batches, take notes, on your favorites, and have a blast.
By far the Pick Your Own website has been my favorite website when learning to can and finding inspiration for new recipes. The site is incredibly informative and displays everything you need to preserve your fruits and veggies.
When it comes to preparing your apples, simply wash, core, and remove any seeds and leaves that may remain. Place your apples in a pot with about an inch of water and cook your apples until they are nice and soft (this can be anywhere from 5 to 20 minutes). At this point you have a few options to process your apple sauce. Some like to press it through a sieve, whereas myself, personally, I like to use a regular blender for a super creamy consistency or hand mash for a "chunky" style. When finished, fill your sterile jars and leave a good amount of head space - 1/2" recommended - before you apply your lids and ring. (For some reason lately, despite leaving about 1/2" head space I have had a few jars "overflow" when processing where as others have been perfect at 1/2" space. The neighbors, however, have been happy to get all of the cans that I am unable to store.) Remove any bubbles with your spatula, apply your lids and rings and process your applesauce in a water bath canner for the amount of time recommended for your altitude (make sure to check The National Center for Home Food Preservation for your recommended processing time.). After processing my sauce I like to let it sit overnight to cool. In the morning I check all of my lids and rings (this is when I discovered some had overflowed!), add some decorative hanging tags and store up for the holidays and special Christmas present.
This fall I hope you all give a go at making your own applesauce. It would be such a wonderful treat, too, for Thanksgiving Dinner, and is a healthier option to pie (although pie can be nice, too!).
Labels:
Buying Local,
Canning & Preserving,
DIY,
DIY & Urban Homesteading,
fall
My Morning Ride - Photo Series
Thursday, October 15, 2015
Every once in a while I like to break from my normal morning gym routine and go for a nice bike ride throughout the city. Despite the fact that city riding is stop and go, I can usually cover around 7 - 10 miles in a 45-minute (give or take) time frame. Although this is quite slow, I spend a lot of time trying to take in the scenery, grab some photos, take note of places I want to come back and visit (is there a new mural being painted somewhere, a new museum being built, those sort of things) and do come calm prep time for the day ahead of me at work. You wouldn't think that there are so many splendors in a cold, concrete city, but I do my best to try and find the little specs of natural beauty among the garbage and skyscrapers.
Tuesday was such a lovely morning that I decided to take a little ride in a different direction in search of some sights along the water. So, I grabbed my bike and headed out. The temperature has had a nice little drop lately and you could tell fall is in the air.
I was able to grab a few photos as the sun was finishing its rise along the river. I love the colors of sunrise and sunset and I was lucky enough that there was not a lot of fog over the water this am.
My favorite photo is this one which was taken very close to the Sugar House Casino here in Philadelphia. What I didn't show you is the big pile of trash and sludge that was directly under the rail where I took the photos. There were literally car parts, household construction waste, and foodstuffs either dumped or washed up from the river. The way people treat their land is absolutely deplorable. I really don't understand how people can't graps that our Earth is a gift to us and it is our duty to take care of it and treat it with respect.
Anyway, I hope you enjoyed these photos as much as I enjoyed taking them.
Labels:
All Around Philadelphia,
Photography
A Quick & Easy Guide to Wood Stain
Wednesday, October 14, 2015
For anyone who know me, I am always doing some sort of work and posting dozens of pictures on my Facebook showing off how proud I am of my accomplishments. Some girls take pride in their perfect makeup skills whereas I take pride in perfect brush strokes and straight tile lines. Not to say that make up can't be fun, but I find things that are a bit more permanent to be more rewarding.
Whenever I do post pictures I am usually met with questions of how I learned my construction-style skills. I assume because I am a girl that the traditional gender role attitudes growing up prevented these girl friends from learning how to create beautiful homes, unless, of course, they involved curtains and shams. Sad. Well, like lots of girls, I had fatherly influence in the field of cutting and hammering at a young age. When most girls had store bought doll houses my dad and I built one from scratch...literally. No kits, no pre-fab, just wood and carpet remnants. And the rest? Hours of the DIY Network and YouTube helped me figure the rest out.
When the hubby and I took a chance and gutted a good bit of the house about five years ago, not only did we find a lot of things that unexpectedly needed fixing (shoddy electric and blatant code violations for one), we also had to teach ourselves some things if we wanted to have the look and function we were after without having to pay the high price of contractors. For instance, I developed an admiration of stained wood. I flat out refused to work so hard on the house and have prefab white hollow-core doors from the Home Depot slapped back onto the frames. So, we scraped up the money for solid wood doors. To make the overall cost a little less, we decided to finish and install them ourselves rather than pay someone for a finished product...but it meant that I needed to learn a new skill.
Until then I never used any sort of stain or lacquer or varnish before in my life, and although I was quite intimidated at first, I found that it really was a lot easier that a lot of paint projects. Since then, I have successfully completed about 15-20 projects in the territory, all without any mess ups. Here, I hope to help anyone get over their uneasiness of trying a new staining project on their own with some simple steps.
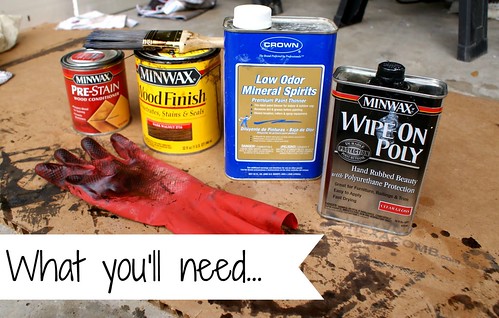
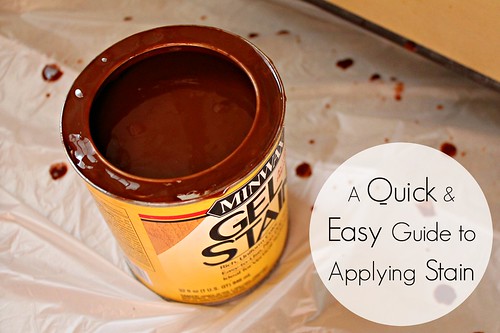
YOUR STAIN: First you want to select the type of stain that is appropriate for your project. For instance, a regular oil based stain is good for wood projects, however, since one of our doors is made from fiberglass I needed to select a gel stain. You will also want a polyurethane finish to apply once your stain is set. A small can will do since you really are not applying a lot.
In addition to your stain and polyurethane finish you will need a few other items to complete your job. Depending on whether you are staining something new or an old, previously finished project, you will need different items. For now, lets focus on a piece of "fresh" wood, in my case a new door. In this case you will need some sand paper in two different grits: one fine and the other coarse which will be used to prep your surface. To apply the stain and finish I like a synthetic paint brush: one for each. You also want to have some lint free cloths, a tarp, painter's tape (if applicable) and a fan to ventilate the odor. Although I honestly despise working with gloves, I would recommend them. Also, a lot of sites recommend applying a wood conditioning to your piece. Honestly, I have never prepped my projects and found a good cleaning with some mineral spirits to remove any oils coupled with a sanding to be fine.
Now begin!
For reference, I present you with this lovely door that has remained hung in my home unfinished for the past four years. Unfortunately, it was purchased and hung right when I was pregnant and unable to work. Also unfortunately, it has remained unfinished since then and required some extensive sanding a cleaning to prep.
Check your surface for any sort of splinters, bumps, or other imperfections. Use your coarse paper and sand in the direction of the grain. Now use one of your cloths with some spirits and remove the dust. Repeat with the fine grit paper and give your piece some time for any residual spirits to dry.
Lie down a tarp and crack open the can, and stir, stir, stir!!! It is very important to stir your stain. Like salad dressings, your stain is built up of layers and will settle when they sit. You will have bits of pigment settled in the bottom of the can that will need to be mixed back in. You will also probably need to stir a few times during your project, depending on how long it takes you.
Tape up your hardware with painters tape if applicable. Begin applying your stain liberally with your brush working with the grain. If you are working on a project vertically, as I am, do your best to avoid drips and dribbles in the corners if you have any (as seen below). Dab the areas like this with your cloth to soak in this excess stain. If you don't, these little drips can cake on and harden, especially after you apply your clear coat.
If you want to have a deeper, richer tone, leave the stain on between 5 - 10 minutes before wiping it from the surface. For a lighter tone, wipe as soon as you are finished. When wiping, also make sure to go with the grain. After you are finished, allow your piece to dry. Time will depend on the type of surface as well as the temperature / humidity in the room or outside.
Here is my door with one coat of stain:
Lovely, right?
Although this color is nice and smooth and even, I needed to do a second coat to have it match the rest of the doors in the house. I waited about two hours before applying the second coat of stain.
And here is coat #2. Notice how the second application of stain made the color more rich. This is exactly what I was going for: a rich, deep tone.
After the second coat of stain is dry, it is time to apply your clear coat. Personally, I prefer to use Minwax Fast Drying polyurethane as it supremely lives up to its standards. With a young child and pets in the home, anything that makes a project go a little quicker means that there is less of a chance of one of them messing it up!
It is an absolute must that you apply a clear coat to your household projects. Unless your stain included a finish, your piece will remain unprotected from the elements (weather, stains, and other forms of damage) if you do not apply a poly-clear coat. You don't want all of that hard work to get ruined, right? So, using your second paint brush, apply your clear coat in a fine and even coat, again working with the grain of the wood, but first, make sure that your surface didn't get any bits of dirt or dust caught in it while your stain was drying. You'll notice that the fumes of your polyurethane are much stronger that those of your stain, so keep that fan running and crack open the windows! Also, never shake your can of polyurethane. This will introduce little bubbles into your mixture that WILL show in your finished piece. A quick and gentle stir is all you'll need.
Spread the varnish over the entire surface with long, even strokes. Don’t use too much or you’re likely to get runs or drips and these are not as easy to clean up as any that happen with your stain. Try to overlap your strokes to get a clean, uniform coating. This will also help to catch any drips that may happen. Allow your first coat to dry and inspect. If you failed to catch any runs or drips in the coating, use a razor blade and gently cut them away. Apply a second coat if desired and wait 24 hours. Should you still see any blemishes in the coating, use a tiny bit of damp sandpaper to gently rub them away.
After about 48 hours you will know if you need any additional coats. I have never personally used more than two coats on a project before and have been fortunate enough to have been blessed with a steady hand and a good eye to avoid any mishaps.
Above is a photo taken 24 hours after the completion of my door. This was my first time working with fiberglass as opposed to pine or oak, however, the process and curing time remained identical to all of my other projects. The entire process from start to finish took me about seven hours to complete: two hours in between each stain application due to the humidity that day plus the time for my clear coating.
I hope that this tutorial was helpful and help your overcome any fear or anxiety you have about trying your first project. Staining really is a wonderful alternative to painting in many cases and allows you to experiment and create certain moods or add nostaglia to a piece once you get the hang of it. If you have any questions don't hesitate to send me a message and check out the rest of the projects in the blog or on my Pinterest for some inspiration.
Whenever I do post pictures I am usually met with questions of how I learned my construction-style skills. I assume because I am a girl that the traditional gender role attitudes growing up prevented these girl friends from learning how to create beautiful homes, unless, of course, they involved curtains and shams. Sad. Well, like lots of girls, I had fatherly influence in the field of cutting and hammering at a young age. When most girls had store bought doll houses my dad and I built one from scratch...literally. No kits, no pre-fab, just wood and carpet remnants. And the rest? Hours of the DIY Network and YouTube helped me figure the rest out.
When the hubby and I took a chance and gutted a good bit of the house about five years ago, not only did we find a lot of things that unexpectedly needed fixing (shoddy electric and blatant code violations for one), we also had to teach ourselves some things if we wanted to have the look and function we were after without having to pay the high price of contractors. For instance, I developed an admiration of stained wood. I flat out refused to work so hard on the house and have prefab white hollow-core doors from the Home Depot slapped back onto the frames. So, we scraped up the money for solid wood doors. To make the overall cost a little less, we decided to finish and install them ourselves rather than pay someone for a finished product...but it meant that I needed to learn a new skill.
Until then I never used any sort of stain or lacquer or varnish before in my life, and although I was quite intimidated at first, I found that it really was a lot easier that a lot of paint projects. Since then, I have successfully completed about 15-20 projects in the territory, all without any mess ups. Here, I hope to help anyone get over their uneasiness of trying a new staining project on their own with some simple steps.
YOUR STAIN: First you want to select the type of stain that is appropriate for your project. For instance, a regular oil based stain is good for wood projects, however, since one of our doors is made from fiberglass I needed to select a gel stain. You will also want a polyurethane finish to apply once your stain is set. A small can will do since you really are not applying a lot.
In addition to your stain and polyurethane finish you will need a few other items to complete your job. Depending on whether you are staining something new or an old, previously finished project, you will need different items. For now, lets focus on a piece of "fresh" wood, in my case a new door. In this case you will need some sand paper in two different grits: one fine and the other coarse which will be used to prep your surface. To apply the stain and finish I like a synthetic paint brush: one for each. You also want to have some lint free cloths, a tarp, painter's tape (if applicable) and a fan to ventilate the odor. Although I honestly despise working with gloves, I would recommend them. Also, a lot of sites recommend applying a wood conditioning to your piece. Honestly, I have never prepped my projects and found a good cleaning with some mineral spirits to remove any oils coupled with a sanding to be fine.
Let's recap: stain, varnish, polyurethane, natural bristle brush, synthetic brush, cloths, coarse sandpaper, fine sandpaper, mineral spirits, fan (optional), tape (if necessary) gloves (recommended but still optional),tarp.
Now begin!
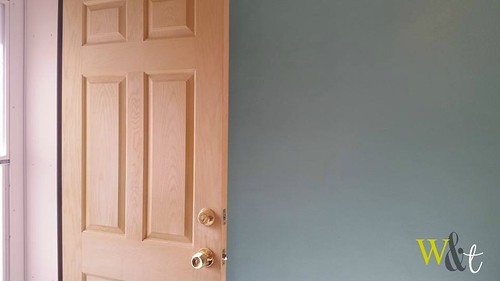
For reference, I present you with this lovely door that has remained hung in my home unfinished for the past four years. Unfortunately, it was purchased and hung right when I was pregnant and unable to work. Also unfortunately, it has remained unfinished since then and required some extensive sanding a cleaning to prep.
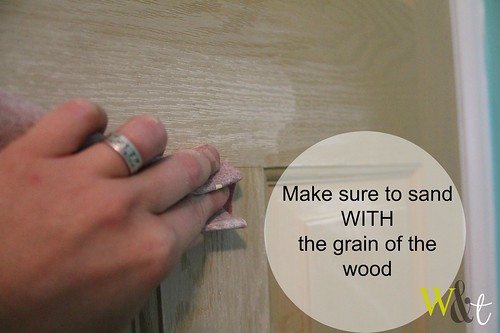
Check your surface for any sort of splinters, bumps, or other imperfections. Use your coarse paper and sand in the direction of the grain. Now use one of your cloths with some spirits and remove the dust. Repeat with the fine grit paper and give your piece some time for any residual spirits to dry.
Lie down a tarp and crack open the can, and stir, stir, stir!!! It is very important to stir your stain. Like salad dressings, your stain is built up of layers and will settle when they sit. You will have bits of pigment settled in the bottom of the can that will need to be mixed back in. You will also probably need to stir a few times during your project, depending on how long it takes you.
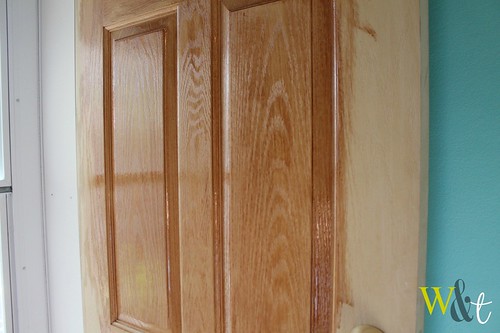
Tape up your hardware with painters tape if applicable. Begin applying your stain liberally with your brush working with the grain. If you are working on a project vertically, as I am, do your best to avoid drips and dribbles in the corners if you have any (as seen below). Dab the areas like this with your cloth to soak in this excess stain. If you don't, these little drips can cake on and harden, especially after you apply your clear coat.
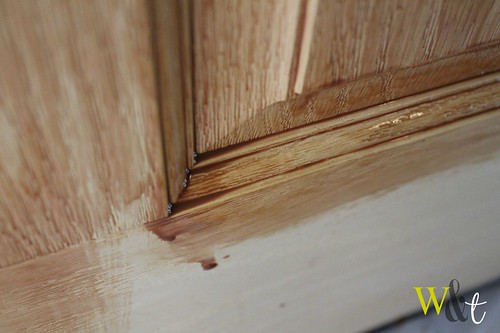
If you want to have a deeper, richer tone, leave the stain on between 5 - 10 minutes before wiping it from the surface. For a lighter tone, wipe as soon as you are finished. When wiping, also make sure to go with the grain. After you are finished, allow your piece to dry. Time will depend on the type of surface as well as the temperature / humidity in the room or outside.
Here is my door with one coat of stain:
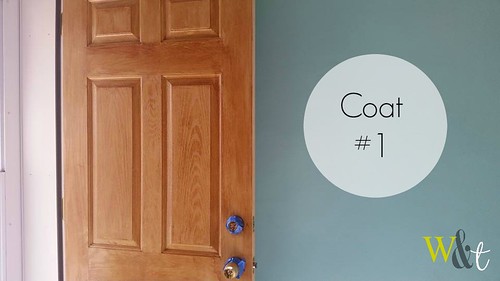
Lovely, right?
Although this color is nice and smooth and even, I needed to do a second coat to have it match the rest of the doors in the house. I waited about two hours before applying the second coat of stain.
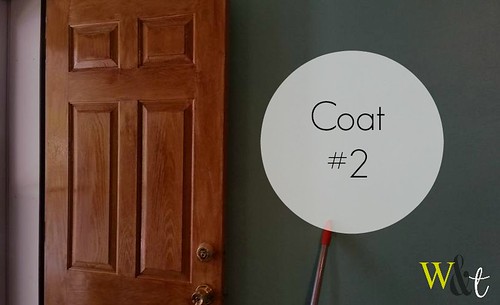
And here is coat #2. Notice how the second application of stain made the color more rich. This is exactly what I was going for: a rich, deep tone.
After the second coat of stain is dry, it is time to apply your clear coat. Personally, I prefer to use Minwax Fast Drying polyurethane as it supremely lives up to its standards. With a young child and pets in the home, anything that makes a project go a little quicker means that there is less of a chance of one of them messing it up!
It is an absolute must that you apply a clear coat to your household projects. Unless your stain included a finish, your piece will remain unprotected from the elements (weather, stains, and other forms of damage) if you do not apply a poly-clear coat. You don't want all of that hard work to get ruined, right? So, using your second paint brush, apply your clear coat in a fine and even coat, again working with the grain of the wood, but first, make sure that your surface didn't get any bits of dirt or dust caught in it while your stain was drying. You'll notice that the fumes of your polyurethane are much stronger that those of your stain, so keep that fan running and crack open the windows! Also, never shake your can of polyurethane. This will introduce little bubbles into your mixture that WILL show in your finished piece. A quick and gentle stir is all you'll need.
Spread the varnish over the entire surface with long, even strokes. Don’t use too much or you’re likely to get runs or drips and these are not as easy to clean up as any that happen with your stain. Try to overlap your strokes to get a clean, uniform coating. This will also help to catch any drips that may happen. Allow your first coat to dry and inspect. If you failed to catch any runs or drips in the coating, use a razor blade and gently cut them away. Apply a second coat if desired and wait 24 hours. Should you still see any blemishes in the coating, use a tiny bit of damp sandpaper to gently rub them away.
After about 48 hours you will know if you need any additional coats. I have never personally used more than two coats on a project before and have been fortunate enough to have been blessed with a steady hand and a good eye to avoid any mishaps.
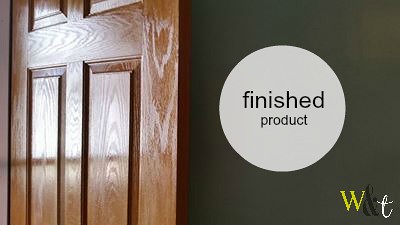
Above is a photo taken 24 hours after the completion of my door. This was my first time working with fiberglass as opposed to pine or oak, however, the process and curing time remained identical to all of my other projects. The entire process from start to finish took me about seven hours to complete: two hours in between each stain application due to the humidity that day plus the time for my clear coating.
I hope that this tutorial was helpful and help your overcome any fear or anxiety you have about trying your first project. Staining really is a wonderful alternative to painting in many cases and allows you to experiment and create certain moods or add nostaglia to a piece once you get the hang of it. If you have any questions don't hesitate to send me a message and check out the rest of the projects in the blog or on my Pinterest for some inspiration.
Labels:
DIY,
Home Renovations,
Home Repair,
Tutorial
Subscribe to:
Posts (Atom)