Showing posts with label Tutorial. Show all posts

Halloween Treat Bag Ideas & Free Printable

20151026_074023

Halloween has always been a commercial holiday, obviously, but the past few years I have noticed that it can cost as much as Christmas! Candy is easily $10 a bag and with a few hundred kids (easily) wandering through the neighborhood (Lord, I wish I were in the burbs sometimes), you can charge up a good bit in treats alone. Then come costumes and decorating and parties and school treats...it can be overwhelming...fun, but overwhelming, especially when you have a full plate and are on a budget.

I have to admit, though, that I can go overboard when it comes to trick-or-treats. I adore Halloween. I think it's the artist in me coupled up with the sights and smells and colors of the fall that make it so fun and magical. One year I printed about a hundred treat boxes I had downloaded from the Martha Stewart website and stuffed them with candy and spider rings. (I used old manila three cut file folders they were throwing out and recycled them into the boxes.)  I also made plush felt ghost pins and little stuffed toys for all of the kids on my block or for a special treat for the kids with disabilities who came around that (oh they loved them so much!). I spend hours trying to make things extra special, although most of the time I honestly think that the majority of the kids who come could care less. :(

It's a lot harder now with a different job, cramped schedule, and a young child, too, so I always try to look for ways to make the holiday a little easier for me. A few years ago I found something a little more thrifty and a lot easier to make treat bags with: cello bags. Cello bags are the perfect size to fill with treats, can be decorated nicely, and are only around $2 for a hundred. Plus, they are always in stock at any craft store and any extras can be used up to bag other homemade treats like pretzels and homemade candy. Last year, while introducing myself to the wonderful world of Pinterest, I found the most adorable chevron print-outs for them too from The Unoriginal Mom blog and I have used them for the past two years now to make my bags (although I do not use card stock since I print so many).

20151015_183521
my living room floor the other evening

This year I needed (like really needed) to stay within a budget for my treats and luckily the Walmart near us has bagged candy for $8 - $10 a bag with around 200 - 300 pieces in each. Granted, they're not Snickers bars, but I tried to doll them up a bit by adding some stickers, rings, and temporary tattoos I picked up at the party store. Some of them also have super balls and play vampire teeth (these ones are for the bigger kids, though) that came in a big packet from Walmart for $4.99 (there are also bubbles in them as well, but I saved these for my son's school). I spent about $32.00 for three big bags and one small bag of candy and another $10 - $15 on the other pieces, which means, I was able to stay within a $50 (almost half of what I spent last year) budget for all of my goodies!

*** TIP: Pick up lots of goodies a the end of the Halloween season cheap from your local craft stores. ***

Over the course of two nights I sat and snipped and stuffed until I completed nearly 200 goodie bags, which are for the regular trick-or-treaters. I still need to come up with something special for my son's class (cupcakes are definitely in the works..and maybe some candy pretzels!!!) I also need to hit the treadmill since I keep sneaking all of the laffy taffy. :)


If you are looking for some inspiration for Halloween treats, I found a great post from Eighteen25.com with lots of printables as well.

What do you do to make the holiday special? 

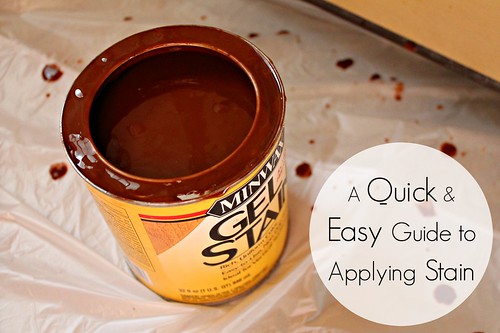
A Quick & Easy Guide to Wood Stain

For anyone who know me, I am always doing some sort of work and posting dozens of pictures on my Facebook showing off how proud I am of my accomplishments. Some girls take pride in their perfect makeup skills whereas I take pride in perfect brush strokes and straight tile lines. Not to say that make up can't be fun, but I find things that are a bit more permanent to be more rewarding.

Whenever I do post pictures I am usually met with questions of how I learned my construction-style skills. I assume because I am a girl that the traditional gender role attitudes growing up prevented these girl friends from learning how to create beautiful homes, unless, of course, they involved curtains and shams. Sad. Well, like lots of girls, I had fatherly influence in the field of cutting and hammering at a young age. When most girls had store bought doll houses my dad and I built one from scratch...literally. No kits, no pre-fab, just wood and carpet remnants.  And the rest? Hours of the DIY Network and YouTube helped me figure the rest out.

When the hubby and I took a chance and gutted a good bit of the house about five years ago, not only did we find a lot of things that unexpectedly needed fixing (shoddy electric and blatant code violations for one), we also had to teach ourselves some things if we wanted to have the look and function we were after without having to pay the high price of contractors. For instance, I developed an admiration of stained wood. I flat out refused to work so hard on the house and have prefab white hollow-core doors from the Home Depot slapped back onto the frames. So, we scraped up the money for solid wood doors. To make the overall cost a little less, we decided to finish and install them ourselves rather than pay someone for a finished product...but it meant that I needed to learn a new skill.

Until then I never used any sort of stain or lacquer or varnish before in my life, and although I was quite intimidated at first, I found that it really was a lot easier that a lot of paint projects. Since then, I have successfully completed about 15-20 projects in the territory, all without any mess ups. Here, I hope to help anyone get over their uneasiness of trying a new staining project on their own with some simple steps.
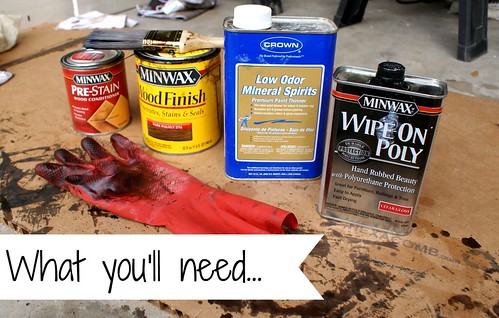

Supplies for Staining YOUR STAIN: First you want to select the type of stain that is appropriate for your project. For instance, a regular oil based stain is good for wood projects, however, since one of our doors is made from fiberglass I needed to select a gel stain. You will also want a polyurethane finish to apply once your stain is set. A small can will do since you really are not applying a lot.

In addition to your stain and polyurethane finish you will need a few other items to complete your job. Depending on whether you are staining something new or an old, previously finished project, you will need different items. For now, lets focus on a piece of "fresh" wood, in my case a new door. In this case you will need some sand paper in two different grits: one fine and the other coarse which will be used to prep your surface. To apply the stain and finish I like a synthetic paint brush: one for each. You also want to have some lint free cloths, a tarp, painter's tape (if applicable) and a fan to ventilate the odor. Although I honestly despise working with gloves, I would recommend them. Also, a lot of sites recommend applying a wood conditioning to your piece. Honestly, I have never prepped my projects and found a good cleaning with some mineral spirits to remove any oils coupled with a sanding to be fine.

Let's recap: stain, varnish, polyurethane, natural bristle brush, synthetic brush, cloths, coarse sandpaper, fine sandpaper, mineral spirits, fan (optional), tape (if necessary) gloves (recommended but still optional),tarp.

Now begin!
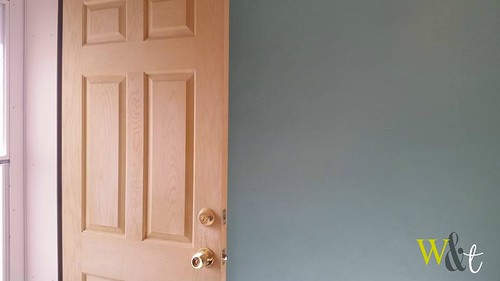
11990571_10156143529225389_9022336087522133413_n For reference, I present you with this lovely door that has remained hung in my home unfinished for the past four years. Unfortunately, it was purchased and hung right when I was pregnant and unable to work. Also unfortunately, it has remained unfinished since then and required some extensive sanding a cleaning to prep.
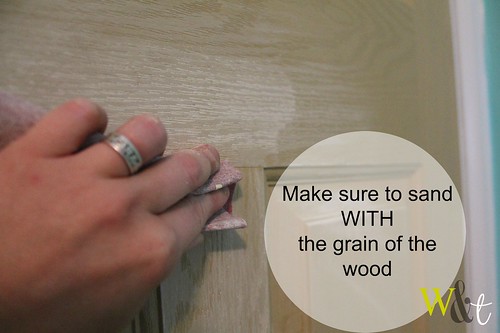
IMG_5357 Check your surface for any sort of splinters, bumps, or other imperfections. Use your coarse paper and sand in the direction of the grain. Now use one of your cloths with some spirits and remove the dust. Repeat with the fine grit paper and give your piece some time for any residual spirits to dry.

Lie down a tarp and crack open the can, and stir, stir, stir!!! It is very important to stir your stain. Like salad dressings, your stain is built up of layers and will settle when they sit. You will have bits of pigment settled in the bottom of the can that will need to be mixed back in. You will also probably need to stir a few times during your project, depending on how long it takes you.
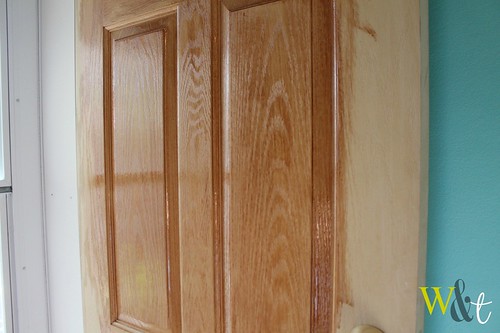
IMG_5356 Tape up your hardware with painters tape if applicable. Begin applying your stain liberally with your brush working with the grain. If you are working on a project vertically, as I am, do your best to avoid drips and dribbles in the corners if you have any (as seen below). Dab the areas like this with your cloth to soak in this excess stain. If you don't, these little drips can cake on and harden, especially after you apply your clear coat.
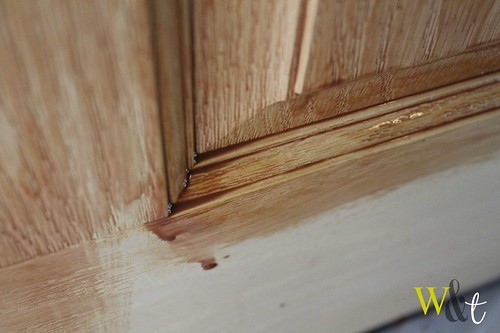
IMG_5354 If you want to have a deeper, richer tone, leave the stain on between 5 - 10 minutes before wiping it from the surface. For a lighter tone, wipe as soon as you are finished. When wiping, also make sure to go with the grain. After you are finished, allow your piece to dry. Time will depend on the type of surface as well as the temperature / humidity in the room or outside.

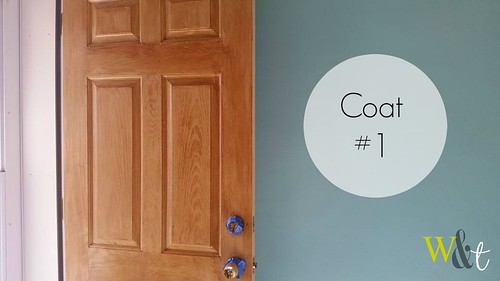
Here is my door with one coat of stain:
1964788_10156143599060389_978271075293398118_n

Lovely, right?

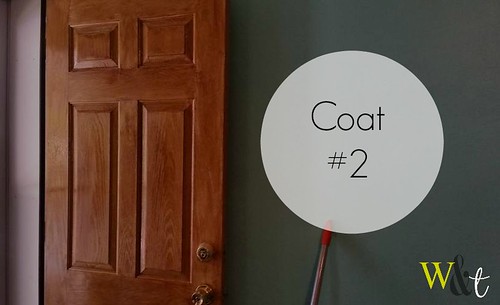
Although this color is nice and smooth and even, I needed to do a second coat to have it match the rest of the doors in the house. I waited about two hours before applying the second coat of stain.

12004769_10156144233375389_9143794217743394804_n

And here is coat #2. Notice how the second application of stain made the color more rich. This is exactly what I was going for: a rich, deep tone.


After the second coat of stain is dry, it is time to apply your clear coat. Personally, I prefer to use Minwax Fast Drying polyurethane as it supremely lives up to its standards. With a young child and pets in the home, anything that makes a project go a little quicker means that there is less of a chance of one of them messing it up!

It is an absolute must that you apply a clear coat to your household projects. Unless your stain included a finish, your piece will remain unprotected from the elements (weather, stains, and other forms of damage) if you do not apply a poly-clear coat. You don't want all of that hard work to get ruined, right? So, using your second paint brush, apply your clear coat in a fine and even coat, again working with the grain of the wood, but first, make sure that your surface didn't get any bits of dirt or dust caught in it while your stain was drying. You'll notice that the fumes of your polyurethane are much stronger that those of your stain, so keep that fan running and crack open the windows! Also, never shake your can of polyurethane. This will introduce little bubbles into your mixture that WILL show in your finished piece. A quick and gentle stir is all you'll need.

Spread the varnish over the entire surface with long, even strokes. Don’t use too much or you’re likely to get runs or drips and these are not as easy to clean up as any that happen with your stain. Try to overlap your strokes to get a clean, uniform coating. This will also help to catch any drips that may happen. Allow your first coat to dry and inspect. If you failed to catch any runs or drips in the coating, use a razor blade and gently cut them away. Apply a second coat if desired and wait 24 hours. Should you still see any blemishes in the coating, use a tiny bit of damp sandpaper to gently rub them away.

After about 48 hours you will know if you need any additional coats. I have never personally used more than two coats on a project before and have been fortunate enough to have been blessed with a steady hand and a good eye to avoid any mishaps.
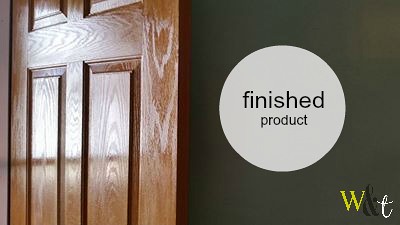
12009757_10156145060880389_3132178492139996310_n Above is a photo taken 24 hours after the completion of my door. This was my first time working with fiberglass as opposed to pine or oak, however, the process and curing time remained identical to all of my other projects. The entire process from start to finish took me about seven hours to complete: two hours in between each stain application due to the humidity that day plus the time for my clear coating.

I hope that this tutorial was helpful and help your overcome any fear or anxiety you have about trying your first project. Staining really is a wonderful alternative to painting in many cases and allows you to experiment and create certain moods or add nostaglia to a piece once you get the hang of it. If you have any questions don't hesitate to send me a message and check out the rest of the projects in the blog or on my Pinterest for some inspiration.

Halloween Costume - Part II - Handmade Narnia Themed Knight's Shield

20151002_072053 It has been a grueling past two weeks, full of household remodeling, hours at work, and me trying my best to get back into my gym & running routine. And despite the lack of sleep from the anxiety and clutter that are part of "construction," I am slowly getting things done. This includes adding more to E's Halloween costume. The stores are busy with candy and costumes and we have already gone through The Great Pumpkin movie at least a hundred times, so I know I only have a little time to get my act together.

I have been working on the chain mail hat/crown piece slowly but surely. With a little one who despises having anything on his head, that part will definitely be taking up more time that it should. Thus, I turned to something more simple: the shield. This piece was probably the easiest to put together; actually, there was little effort at all. Just a steady hand and a place to paint.

Inspiration:

Just like part one of this three-part Halloween Costume series, I took my inspiration from this lovely (and I mean lovely) blog from At The Picket Fence. This AMAZING mom threw an AMAZING Narnia party that would make any kid jealous, so definitely check her page out.

Supplies:

  • wood display base
  • spray paint in desired color ( I used acrylic silver )
  • stencil
  • red acrylic paint ( or other desired color )
  • fine paintbrush
  • polyurethane
  • construction staples or small tack nails
  • scrap cloth thick enough to make a handle
  • sewing machine & thread (or needle to hand sew)  

The Project: 

20150918_074332
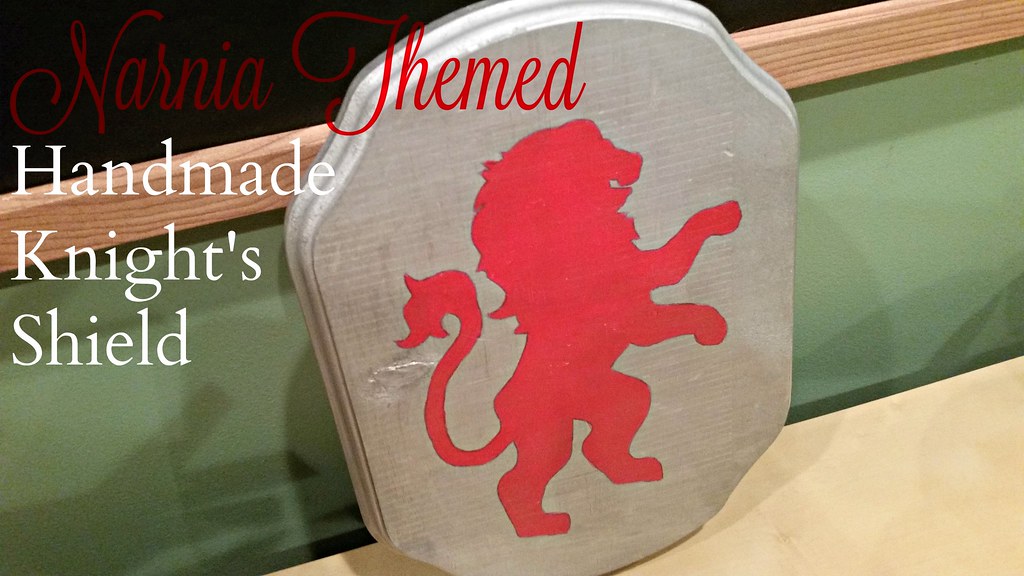
Using one of those "wood block things" from the craft store that are typically used for displaying purposes (I always image taxidermy when I see them), I crafted a shield small enough for a toddler of the tiny-variety. Some silver spray paint, the same stencil from the smock, a paintbrush, some red acrylic, a piece of leftover fabric, and some small tack nails were what I used for this project.

After two generous coats of silver paint (wood is porous and this piece was not primed), I allowed the shield to dry overnight outside (where it was cooler and kept the fumes from the house). I applied the stencil and traced with a pencil to outline. Some bold, red acrylic paint worked wonderfully to bring out the piece's authenticity. I was pleased, also, at the steadiness of my hand, since I had not done any "fine" painting in quite some time. (Walls and ceilings don't count as art!)

20151002_072016

After the paint dried entirely, I applied a thin coat of I folded over some blue scrap fabric to construct a handle. After a little measuring and a top stitch with a complimenting thread, I used some small tack nails to secure the handle into place. I made sure to use something small enough but would also keep the handle in place after some play. You can also opt for construction staples, however, be sure to check the depth of your wood before to make sure nothing "pokes through" that can cut your little one.


20151002_072047

Cost: 
Although the project wasn't difficult I am really happy with how it came out.  The colors are so vibrant and the sizing was just right for my little guy. I splurged a little for the spray paint and bout one that is about $8 a can (but I used my 40% off AC Moore coupon), but the wood block was only $1.99. The acrylic paint and fabric and tacks were all things I had on hand, so this piece cost me about $5 - $6 to make, but it matches the costume so perfectly and this is something my little guy can continue to play for a long time if he chooses.

Small Window Curtain Idea & Tutorial

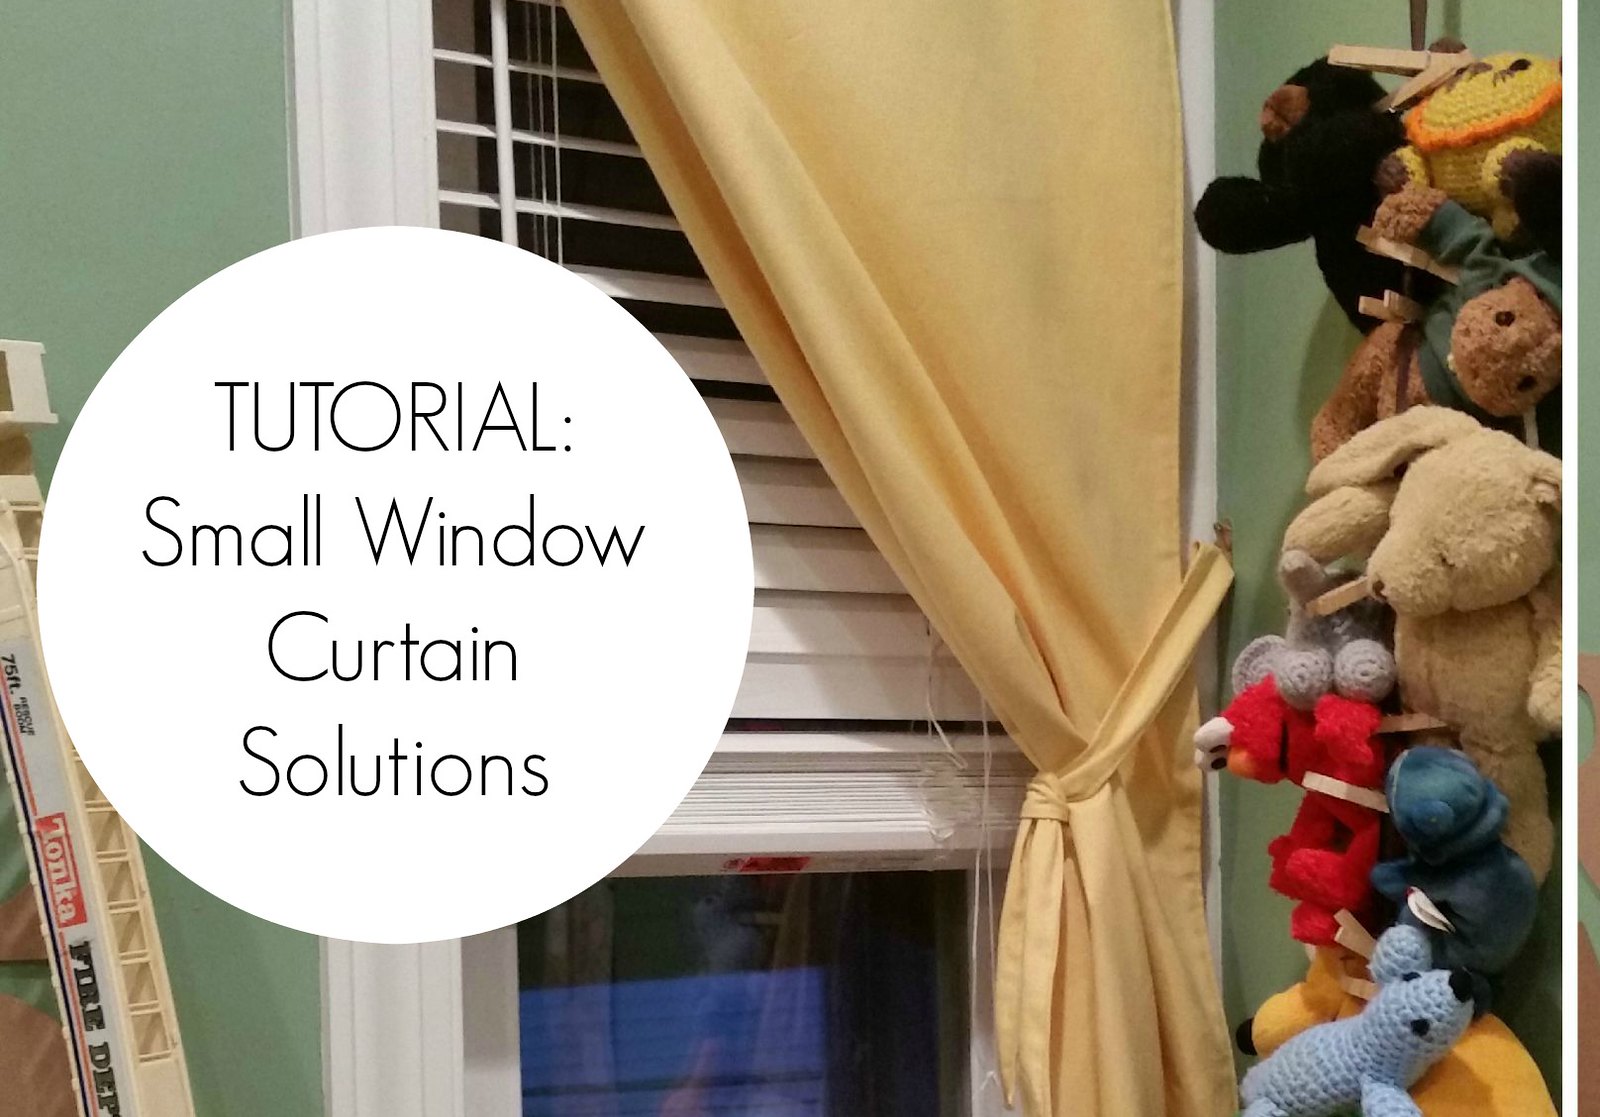
20150828_195302 When I was fixing up E's room these past two months (as well as the rest of the house!), I decided to tackle a project I had been putting off for years...curtains. E's room is actually MY bedroom from childhood (how cute, right?), and I only ever remember simple, little lace curtains on the window. Not exactly boy-room material. And at barely 20" in width, it is not something I can simply head out to IKEA for, either.

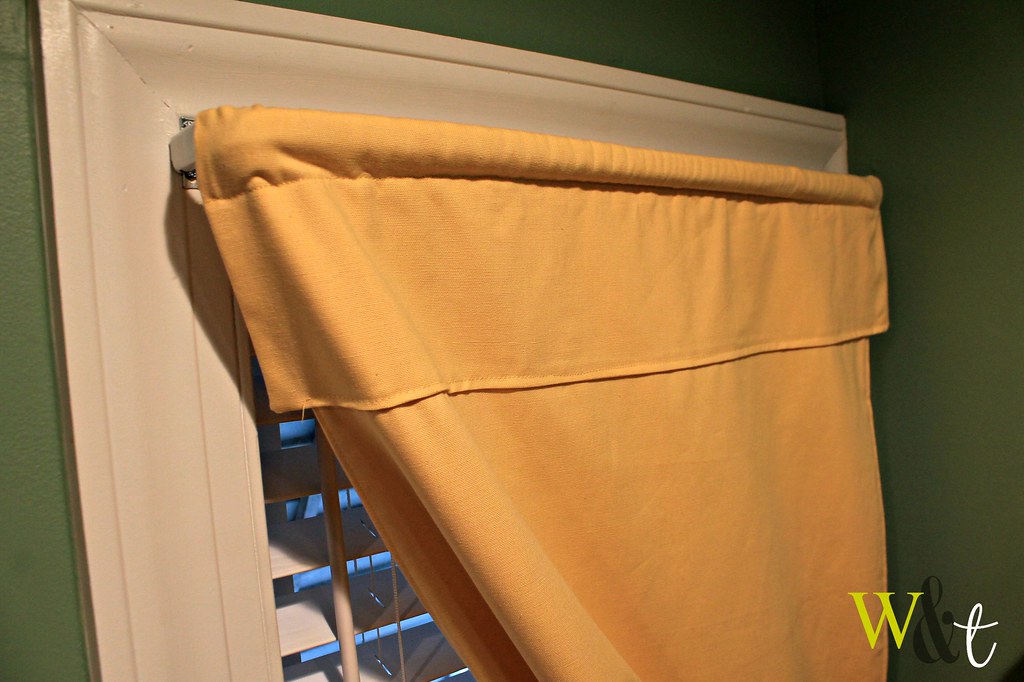
While searching the internet for some ideas and inspiration, I came across THIS link for a shaker curtain. I liked the idea of one, simple piece, and, since we are using blinds as well, a Roman shade was just not going to work.

...small city homes are simply terrible to work with.

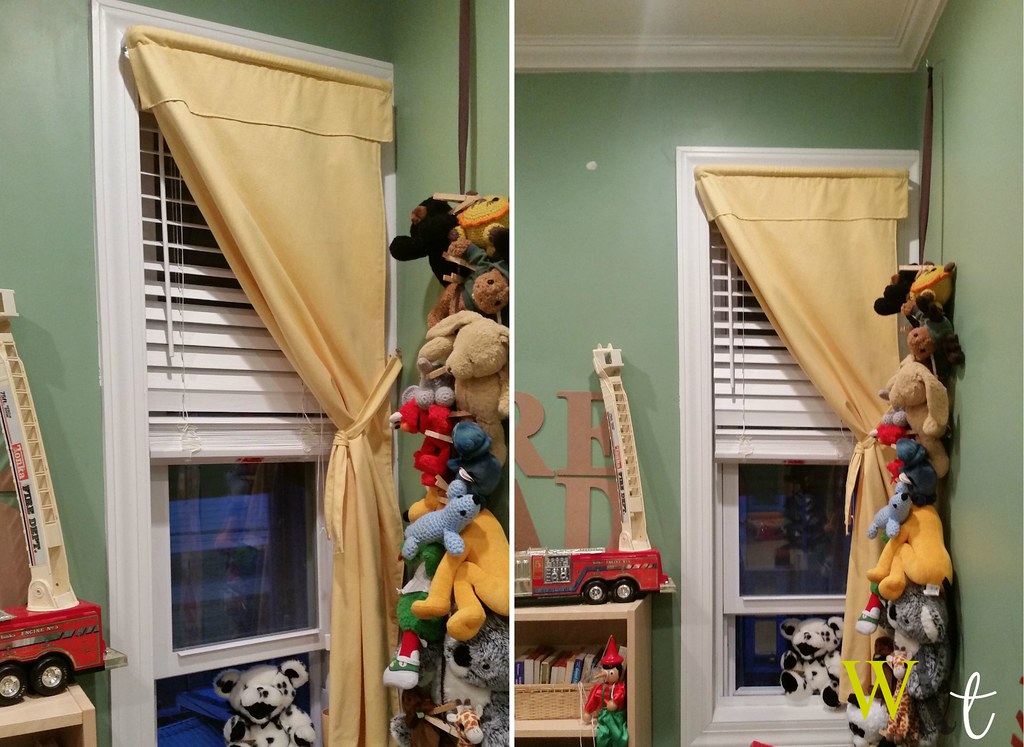
PART I: The Curtain - Despite the narrow width of the window, it is still a standard height, making the idea a little more complex since I could not tack them up the same way as the blog shows. The first thing I did was to measure the width and height of the window. I added about six additional inches to the length of the measurement since the curtain was going to be "bunched up" to one side. The fabric I used was a bright, yellow canvas I bought at on Fabric Row in Philly for about $10 (thank you imperfections for making discount fabric!). I constructed the curtains using a basic method, however, since I can never make things simple, I added a cute little top piece, making them more of a cafe' curtain style. E has a toy kitchen in his room, so they go great. The little extension really helps to hide the side of the curtain rod we needed to use due to the extremely short distance from the end of the window to the wall on the right (which is only about 3"). I'm glad because I really despise those rods, as nostalgic as they can be.  Also, I doubled up the fabric to serve as a lining, since I like all of my curtains lined for some reason (warmth!).

Here is a basic, rudimentary diagram of their layout.


PART II: The Tie - In addition to the fabric for the curtain, I also cut a strip about 3 1/2 ft in length for a tie (doubled up and top stitched). You can also choose to use a regular ribbon or curtain "tassel" and the length depends on where you will secure your curtain and how much slack you want to have. Experiment beforehand and adjust your tie to suit.

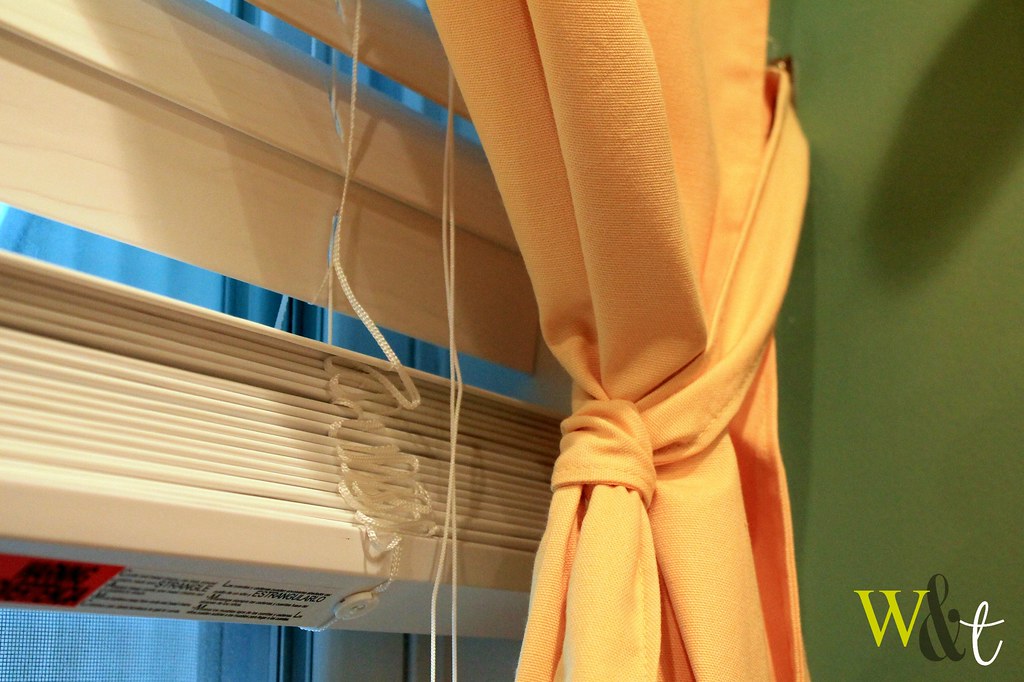
Once I had the curtains up, I had to decide where I would secure it. As I mentioned, the length of the window left the option to tie it up in the upper corner pretty much completely out (as it is shown on the ORIGINAL BLOG I used for reference) so I opted to knot mine to the side. I used a small hook and inserted it into the opposing wall at the proper height (test! test! test! before you go making holes!), and used a cross knot (like tying a dress tie) to secure.


IMG_5224
notice how the extension covers almost all of the curtain rod

IMG_5221 20150828_195302
(pay no attention to the little hole I was patching on the wall! :) )
 
I'm really happy with the way the curtain came out. I was a nervous wreck sewing it (as I usually am), but was pleased when my little experiment worked out for the best...Thankfully.

Tutorial Tuesday: Burlap Wreath

It's (finally) fall! ...and with fall comes all of the beautiful colors of the leaves, cool and crisp weather, and lots of home remodeling for me! Some people Spring Clean, well I prefer the fall to complete all of my remodeling projects and spruce ups.

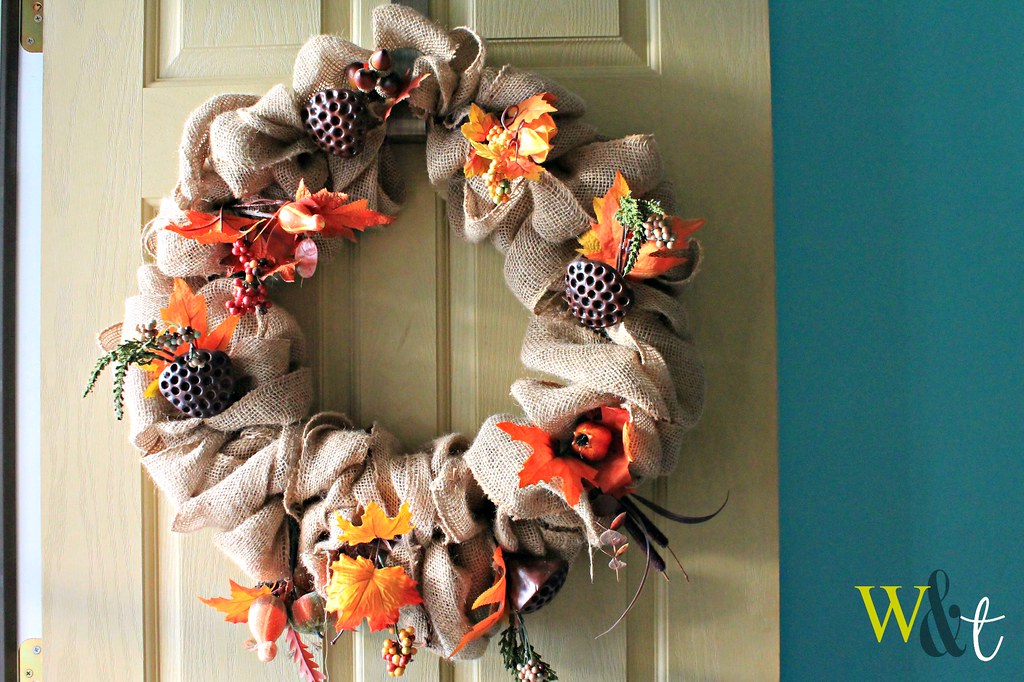
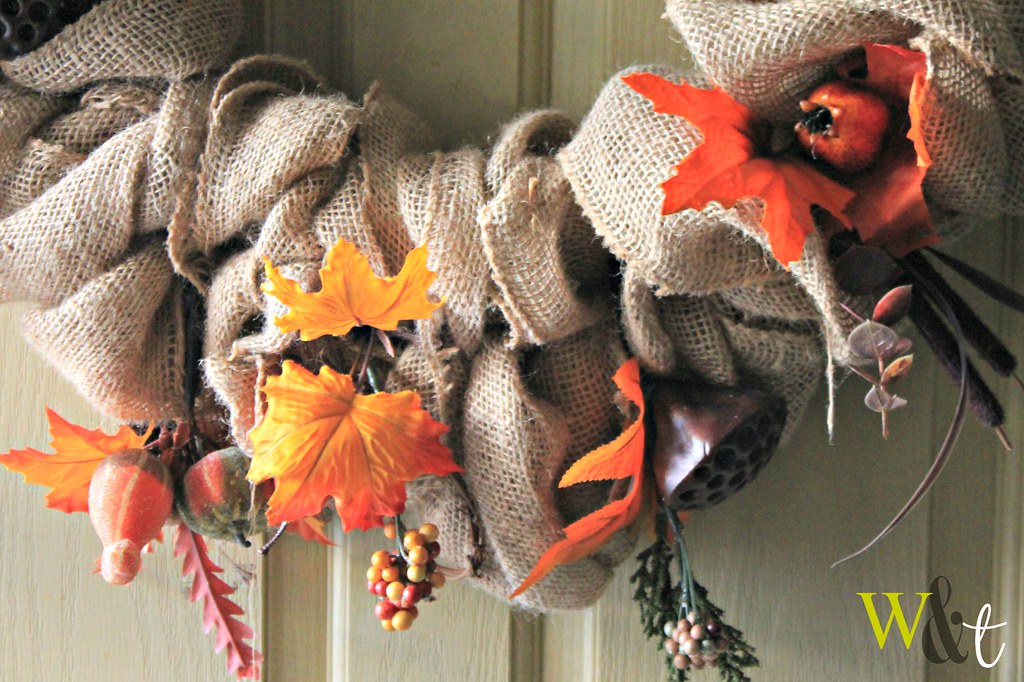
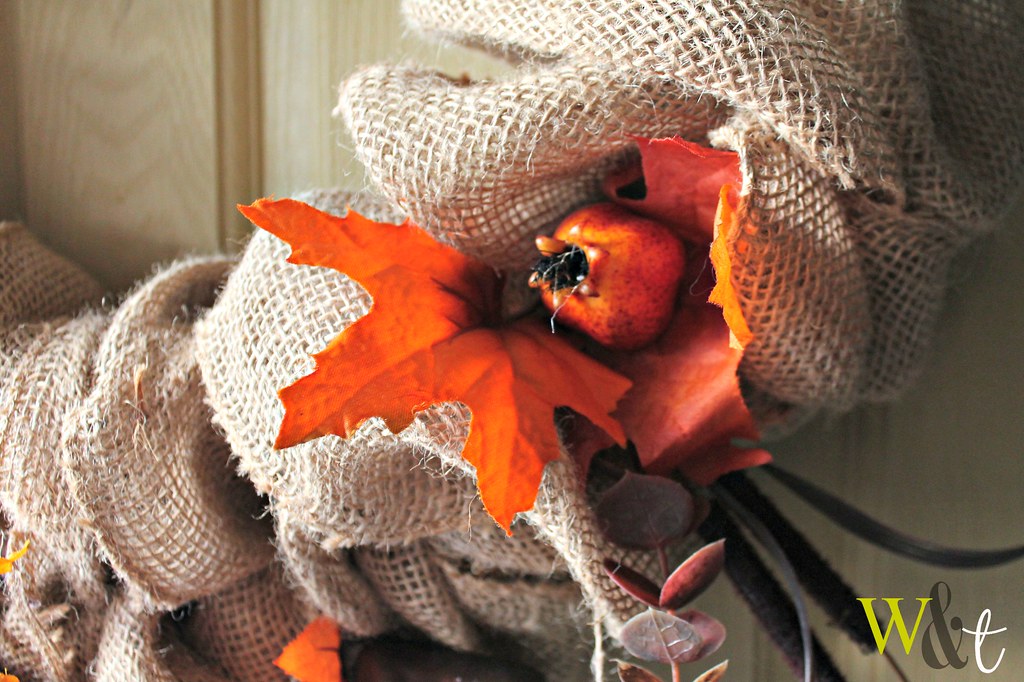
I love getting back into decorating around this time of year, especially because I get to utilize earth tones and textures for the season. I love browns and yellows and oranges all mixed together, so last year I decided to make a burlap wreath for my front door. I coveted the ones on ETSY but knew that I could make something comparable for half of the cost (Thank you AC Moore Coupons!). Although the burlap was about $5 a roll at regular price (and the rolls were on the small size), I simply made a couple of trips for all of my supplies and had the hubby buy some with his own coupon code at the store. In addition to the ring and burlap, I found some adorable little ornaments on clearance for between $.50 to $1 each at the time. In all, I think I spent under $20 for what sells for over $40 (+shipping) online.

I had never made a wreath before, but took the blogosphere for help. I found an easy tutorial at Little Lovely Leaders that had lot of photos to guide me through the process. In all I am proud of how it came out and it held up really well so far (as it was sitting in storage since last year).

IMG_5093 IMG_5092 IMG_5089

To change it up a bit during the fall I buy small wood signs with things like "Happy Fall," "Happy Halloween," and "Give Thanks" (for Thanksgiving)at the craft store and hang them in the center. This way I am able to keep it up the entire season and still add a little more decoration to the door for the holidays.